
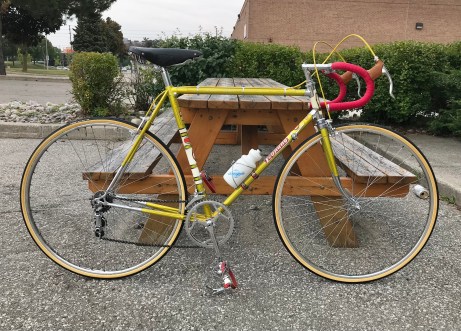
The background on this wonderful Gran Premio was the subject of a post on the main page that you can find here. This Legnano came to me as a one-owner bike in exceptional condition for the near 60 years that have passed since it rolled out of the Bozzi SpA factory. With only a few well-earned scuffs and scratches, all that is planned for this Gran Premio is a conservative restoration that I will detail on this page as I move the project along.
The first task is to carefully disassemble the bike, bagging the small parts and making a few notes along the way to keep things like the right hand cotter pin with the right hand crank, counting up the ball bearings, keeping the nuts with their respective bolts, etc. etc. And take lots of photos as you work, just in case your memory fades a little when it comes time to put it all back together. Those pics have saved me a few times to be sure.
For those readers undertaking this process for the first time, the best advice that I can pass along is to take your time, work slowly and be patient. If you are not sure about how something comes apart or whether it is a right hand or a left hand thread (ie. pedals and bottom brackets), then go online or consult someone that does know . . . for certain. And most importantly, use good tools and the right tools for the task at hand to avoid damaging parts that can be very difficult (and costly) to replace.
If you do not have all of the correct tools or as much experience as you would like in fully disassembling the bottom bracket or removing the headset, take the frame to a good quality shop and have a pro do this work. For the small charge involved, an experienced mechanic will ensure lock rings and nuts are not damaged and when reassembled, proper clearances and ‘play’ between the parts are maintained.
A quality shop that has been around for a while should have the proper tools for extracting the cotters from the crankset, as well as resetting them when the time comes to put the bike back together. I have seen too many frames and cranksets irreparably damaged by well-intentioned but hasty people swinging a hammer and hoping for the best. And don’t be shy, ask the mechanic if they have a cotter extractor in the shop and if they are comfortable doing the work or if they prefer to recommend a shop that has the experience and tools to work on vintage bikes.

At this stage the bike has been disassembled, the bottom bracket and headset have been removed, cleaned, greased and re-assembled. And a good 8-10 hours have been spent carefully cleaning the frame before applying a few coats of a non-abrasive, pure carnauba auto wax. In cleaning the frame I work with a very soft bristled tooth brush, a soft rag and warm water with a mild liquid detergent. It’s a labour of love and I make sure it is a day without interruptions so I can enjoy it.
The factory Legnano ‘lizard yellow’ lacquer is very fragile (as is the white banding on the head tube and seat tube), so you don’t want to go near it with anything that is abrasive or may contain solvent. On the more stubborn areas I sometimes use a bit of Windex but even here the ammonia can begin to remove the paint, so work very carefully with a soft white cloth to monitor things. The waterslide decals can also be very fragile as they dry out over the years.

The bottom bracket area cleaned up nicely, leaving some of the patina and oil staining that has set in to the lacquer over the years.

I often find that the original chrome plating is in much better condition than it first looks, and some careful work with polishing compound will usually remove any light surface corrosion or spotting. I have also used a hand dremel fitted with a small wire brush on the more stubborn or difficult to get at areas but again work slowly, checking as you go, and with no more pressure or dremel speed than is necessary
Be extra careful with the white finish on the head tube as this original paint is soft and easily damaged. Warm water and a mild detergent only, a soft cloth and maybe a very soft bristled toothbrush for the more stubborn areas in and around the head badge. If you are thinking of using a brass polish on the head badge, work extremely carefully with a Q tip and don’t get any on the white paint. If in doubt, just stick with the warm water and mild detergent.
Over the years, some components like the down tube shifters or cable guides may have set a patina or stain into the paint finish (photo above). Do not try to remove these stains as they are set well into the lacquer and are permanent, however they do provide a convenient locator when you come to put everything back together.
Some photos and comments on the cleanup of the components:
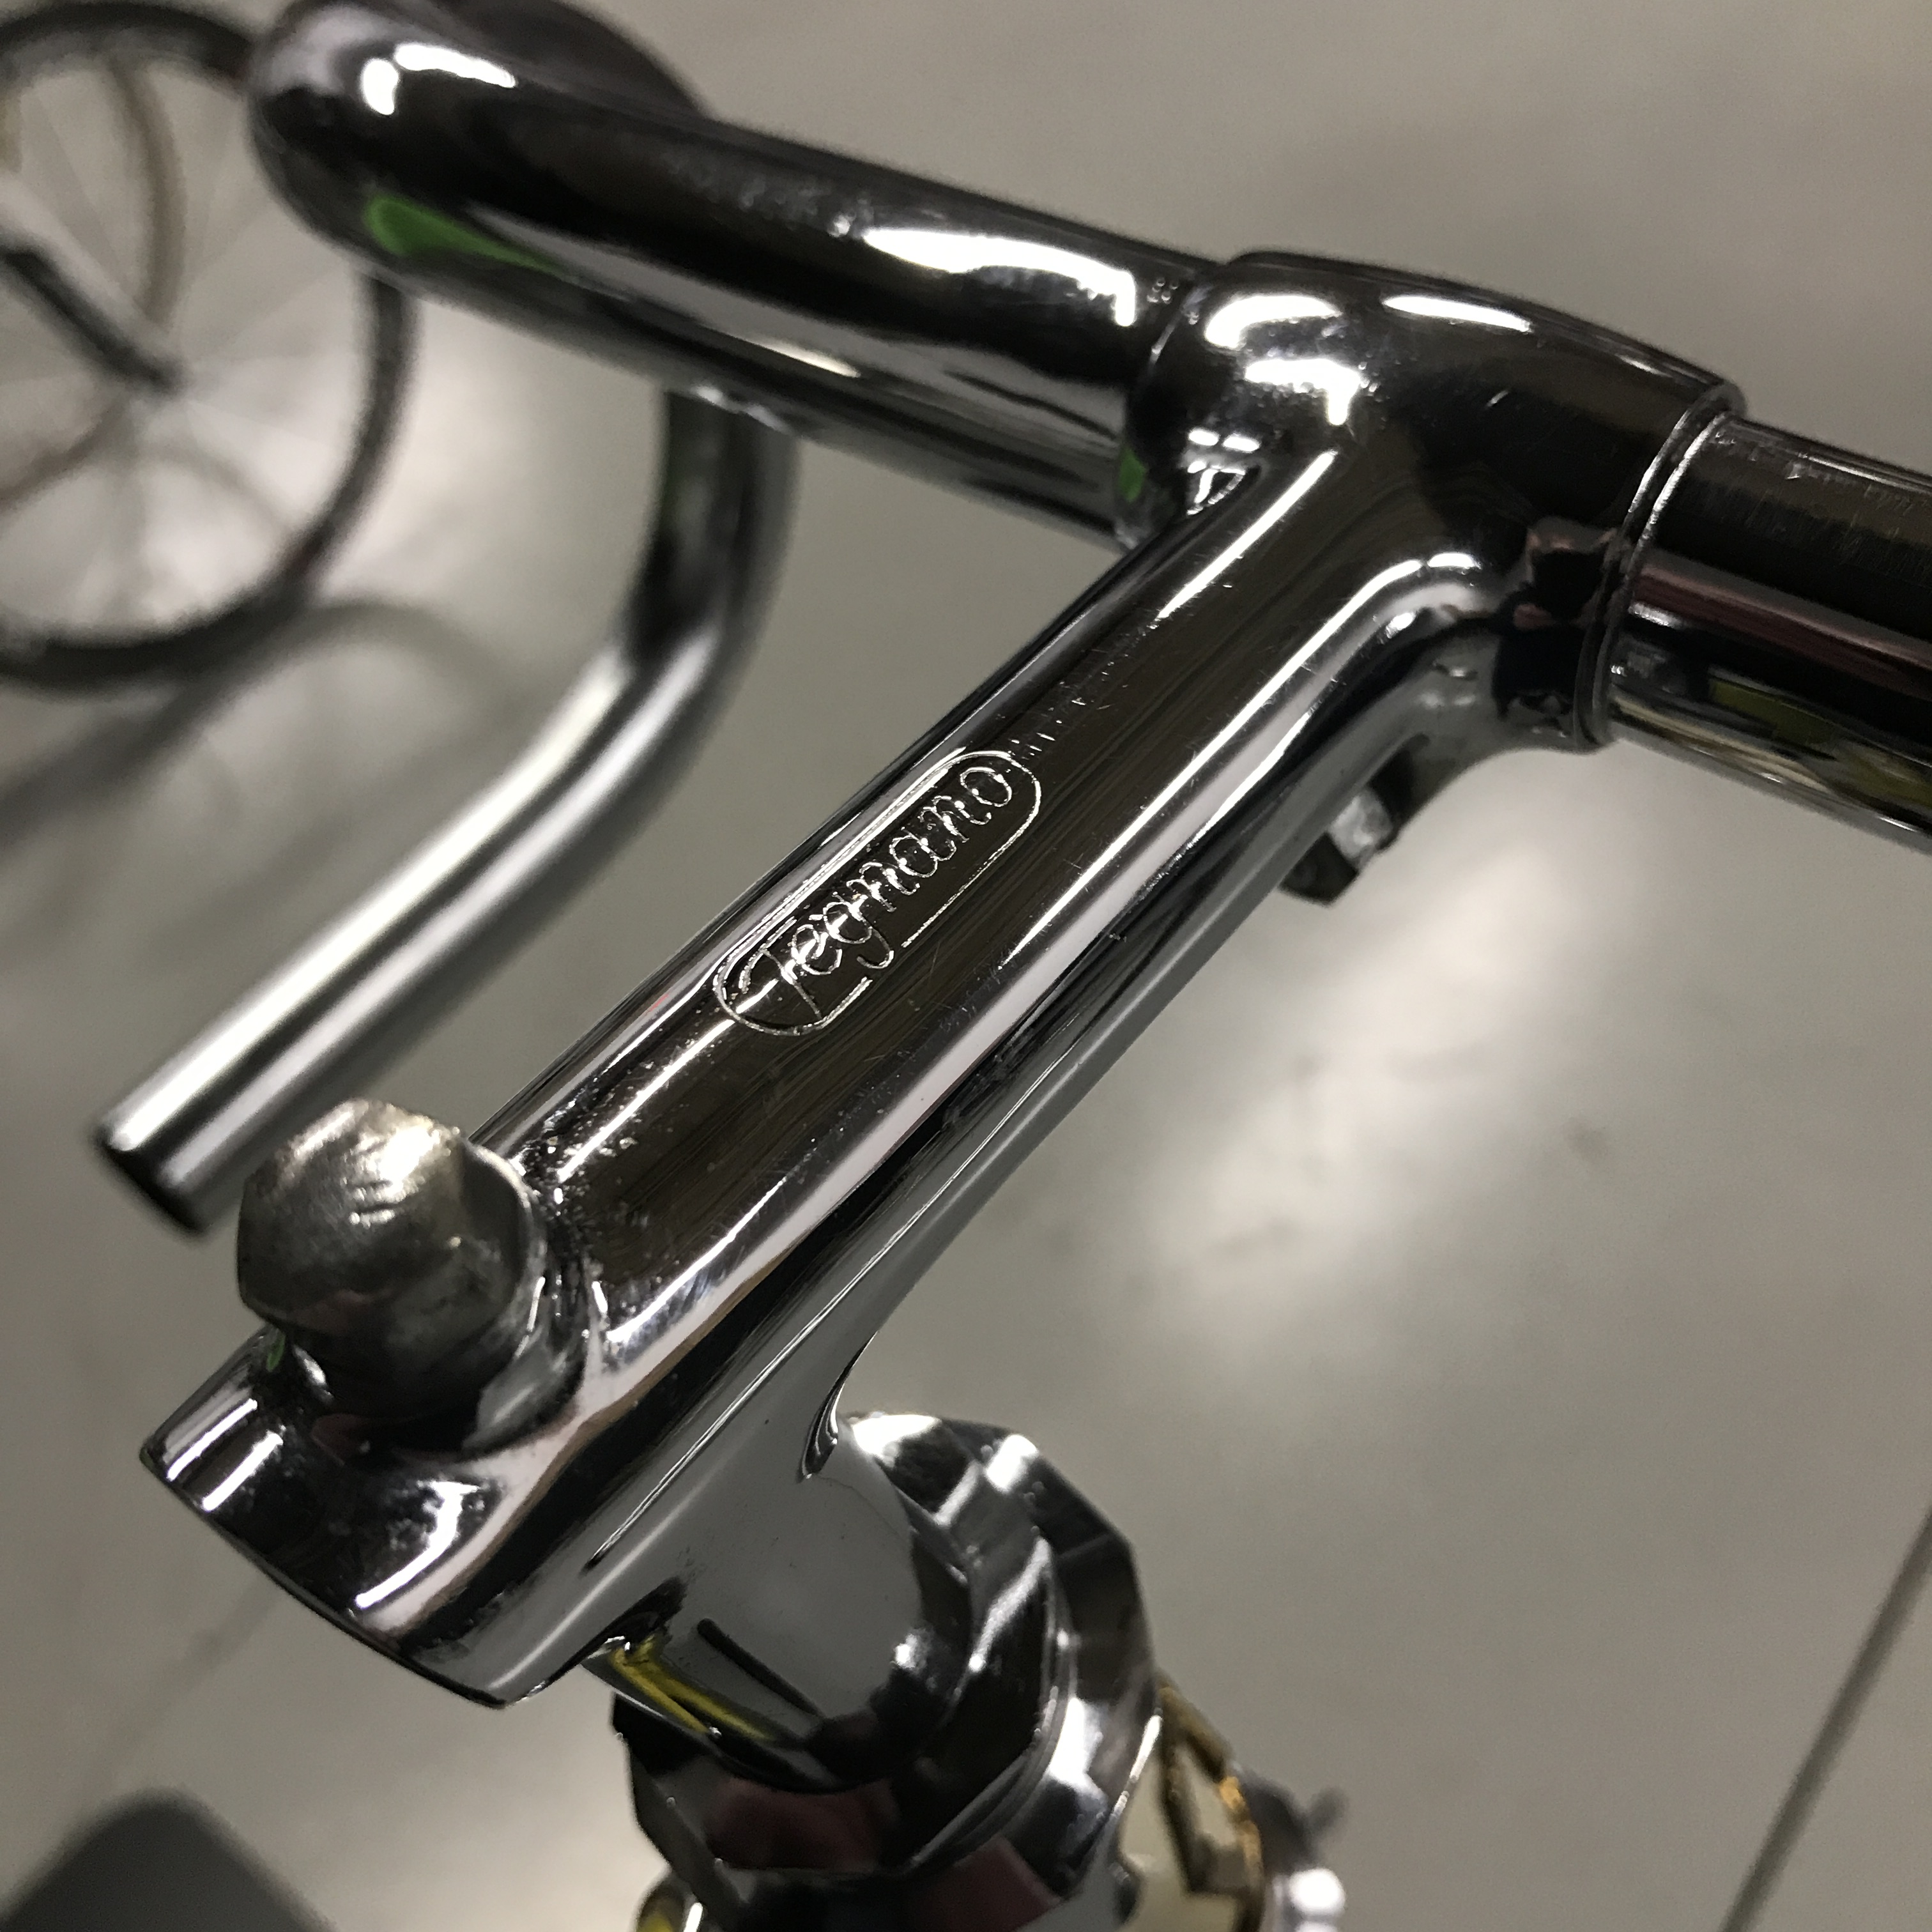
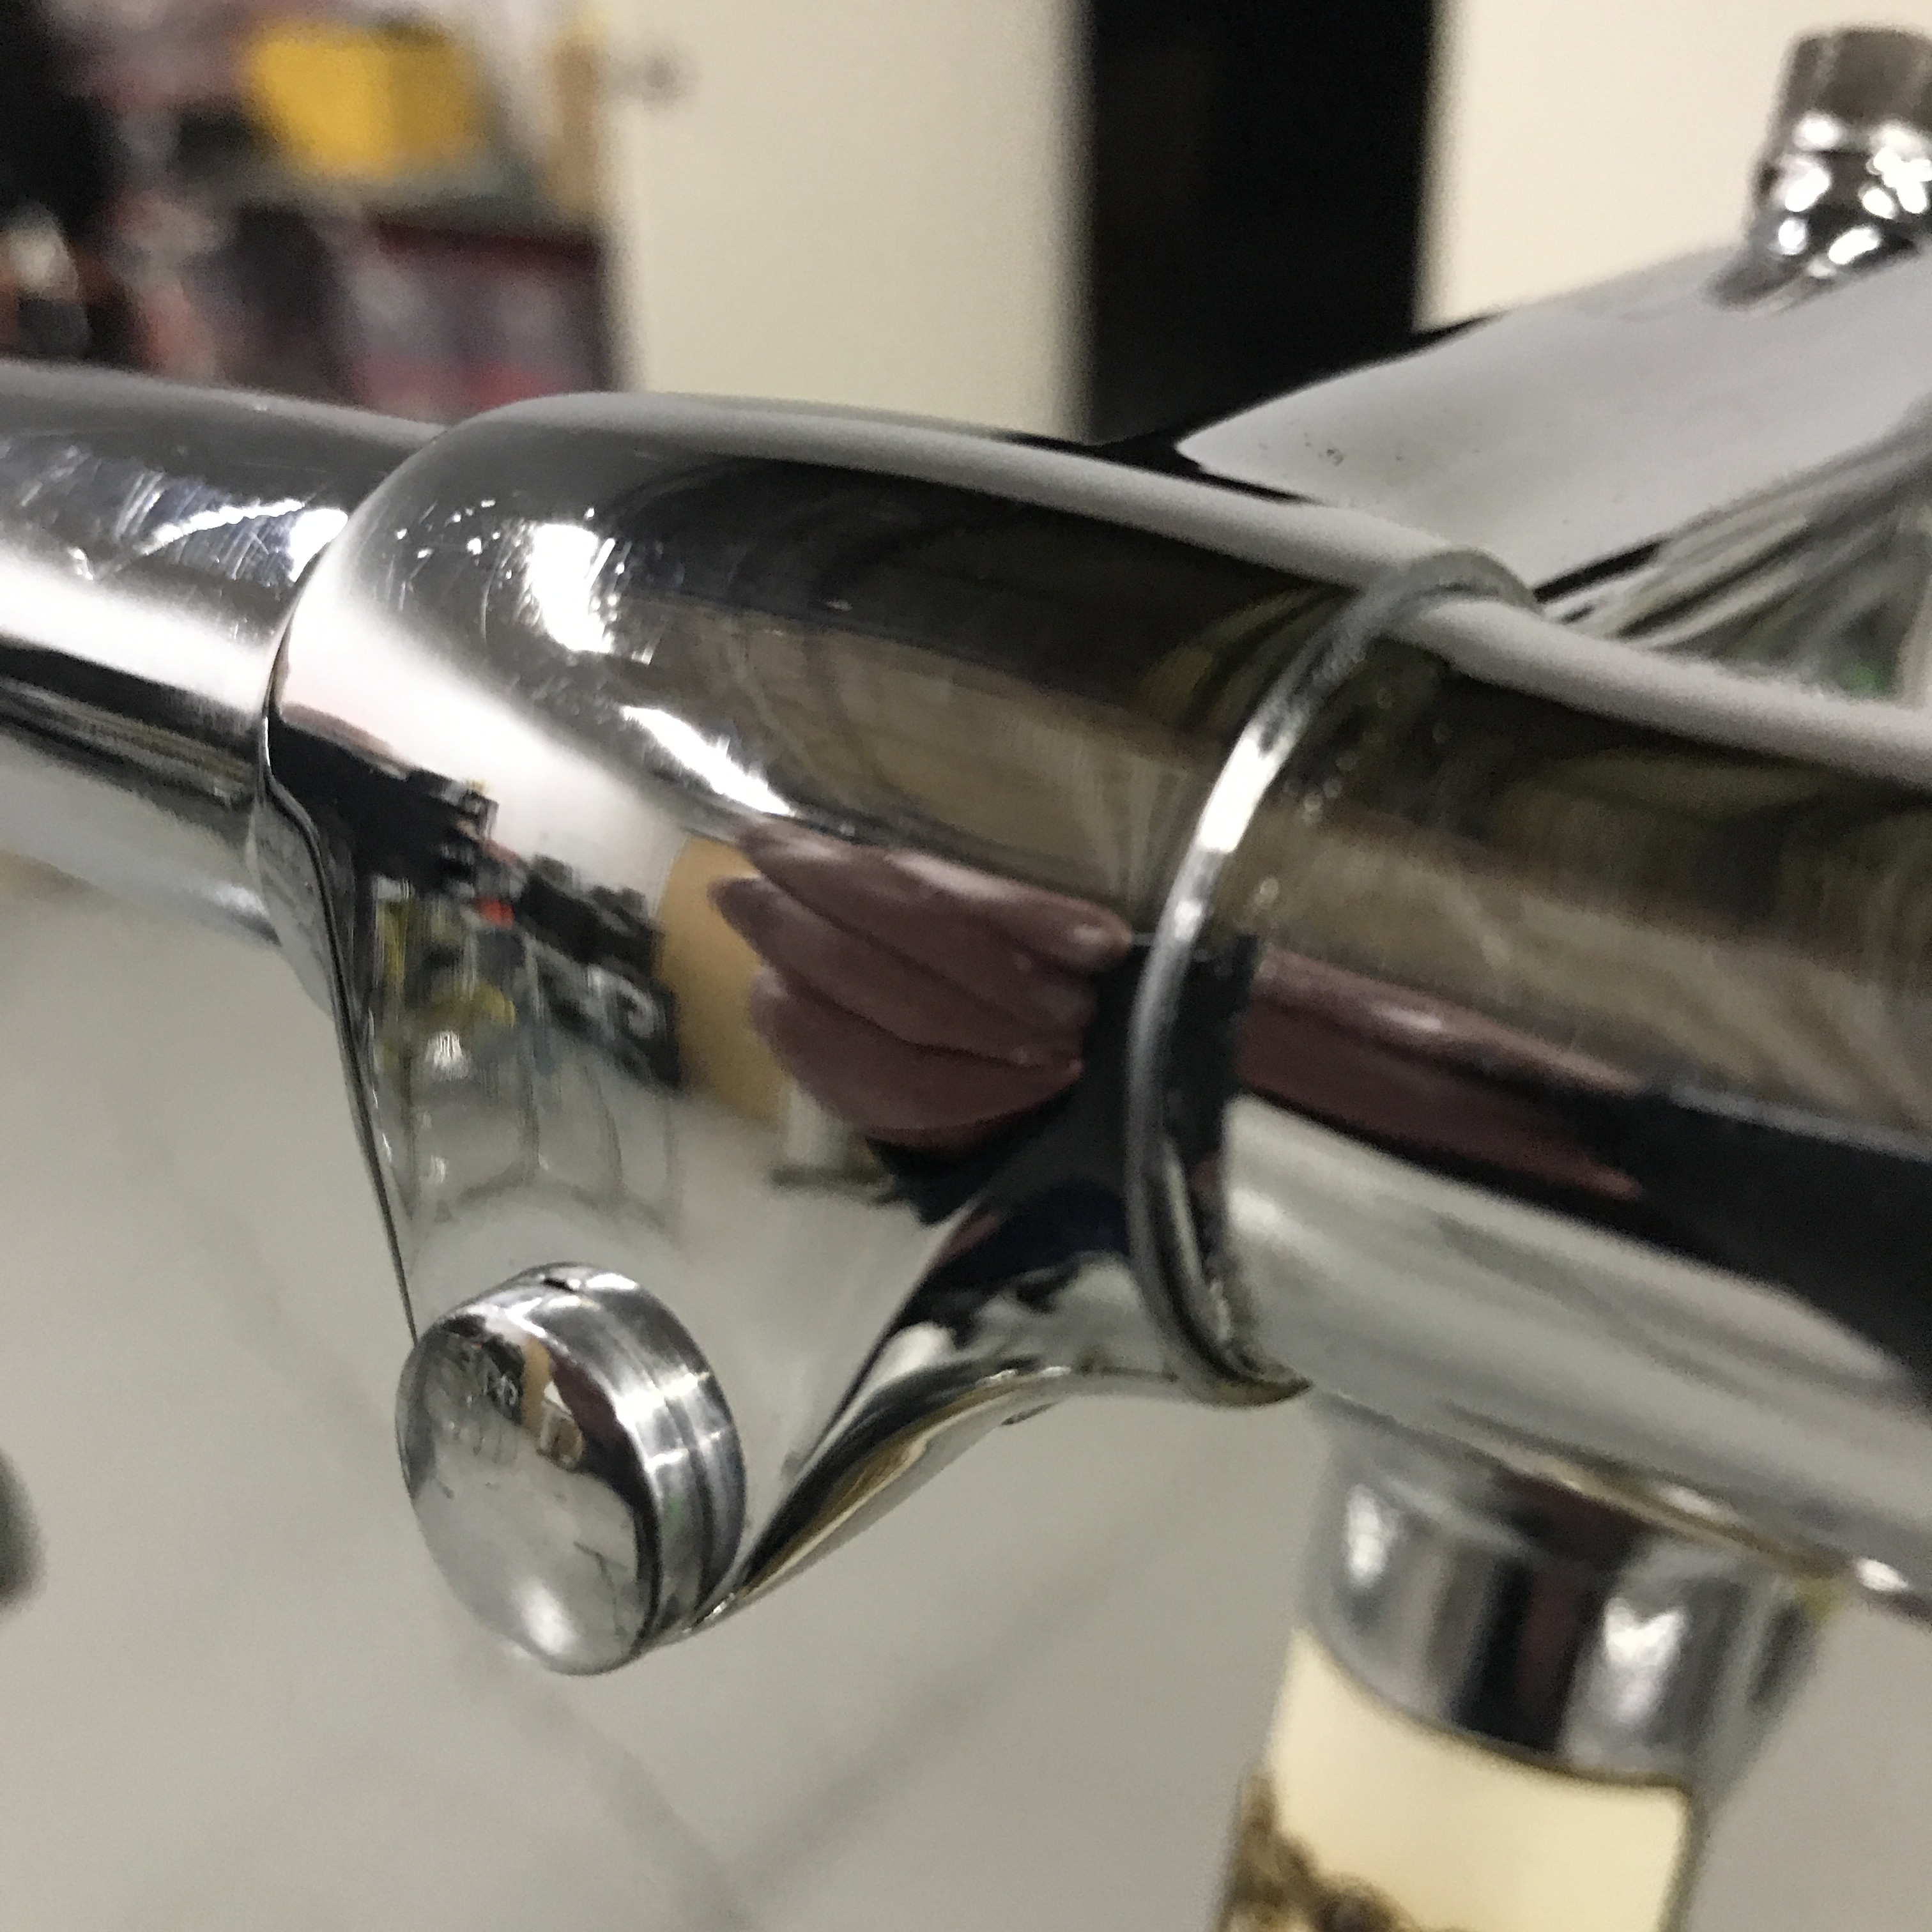
Cinelli steel stem and bars branded for Legnano. The oval Cinelli logo is stamped on the underside of the neck.
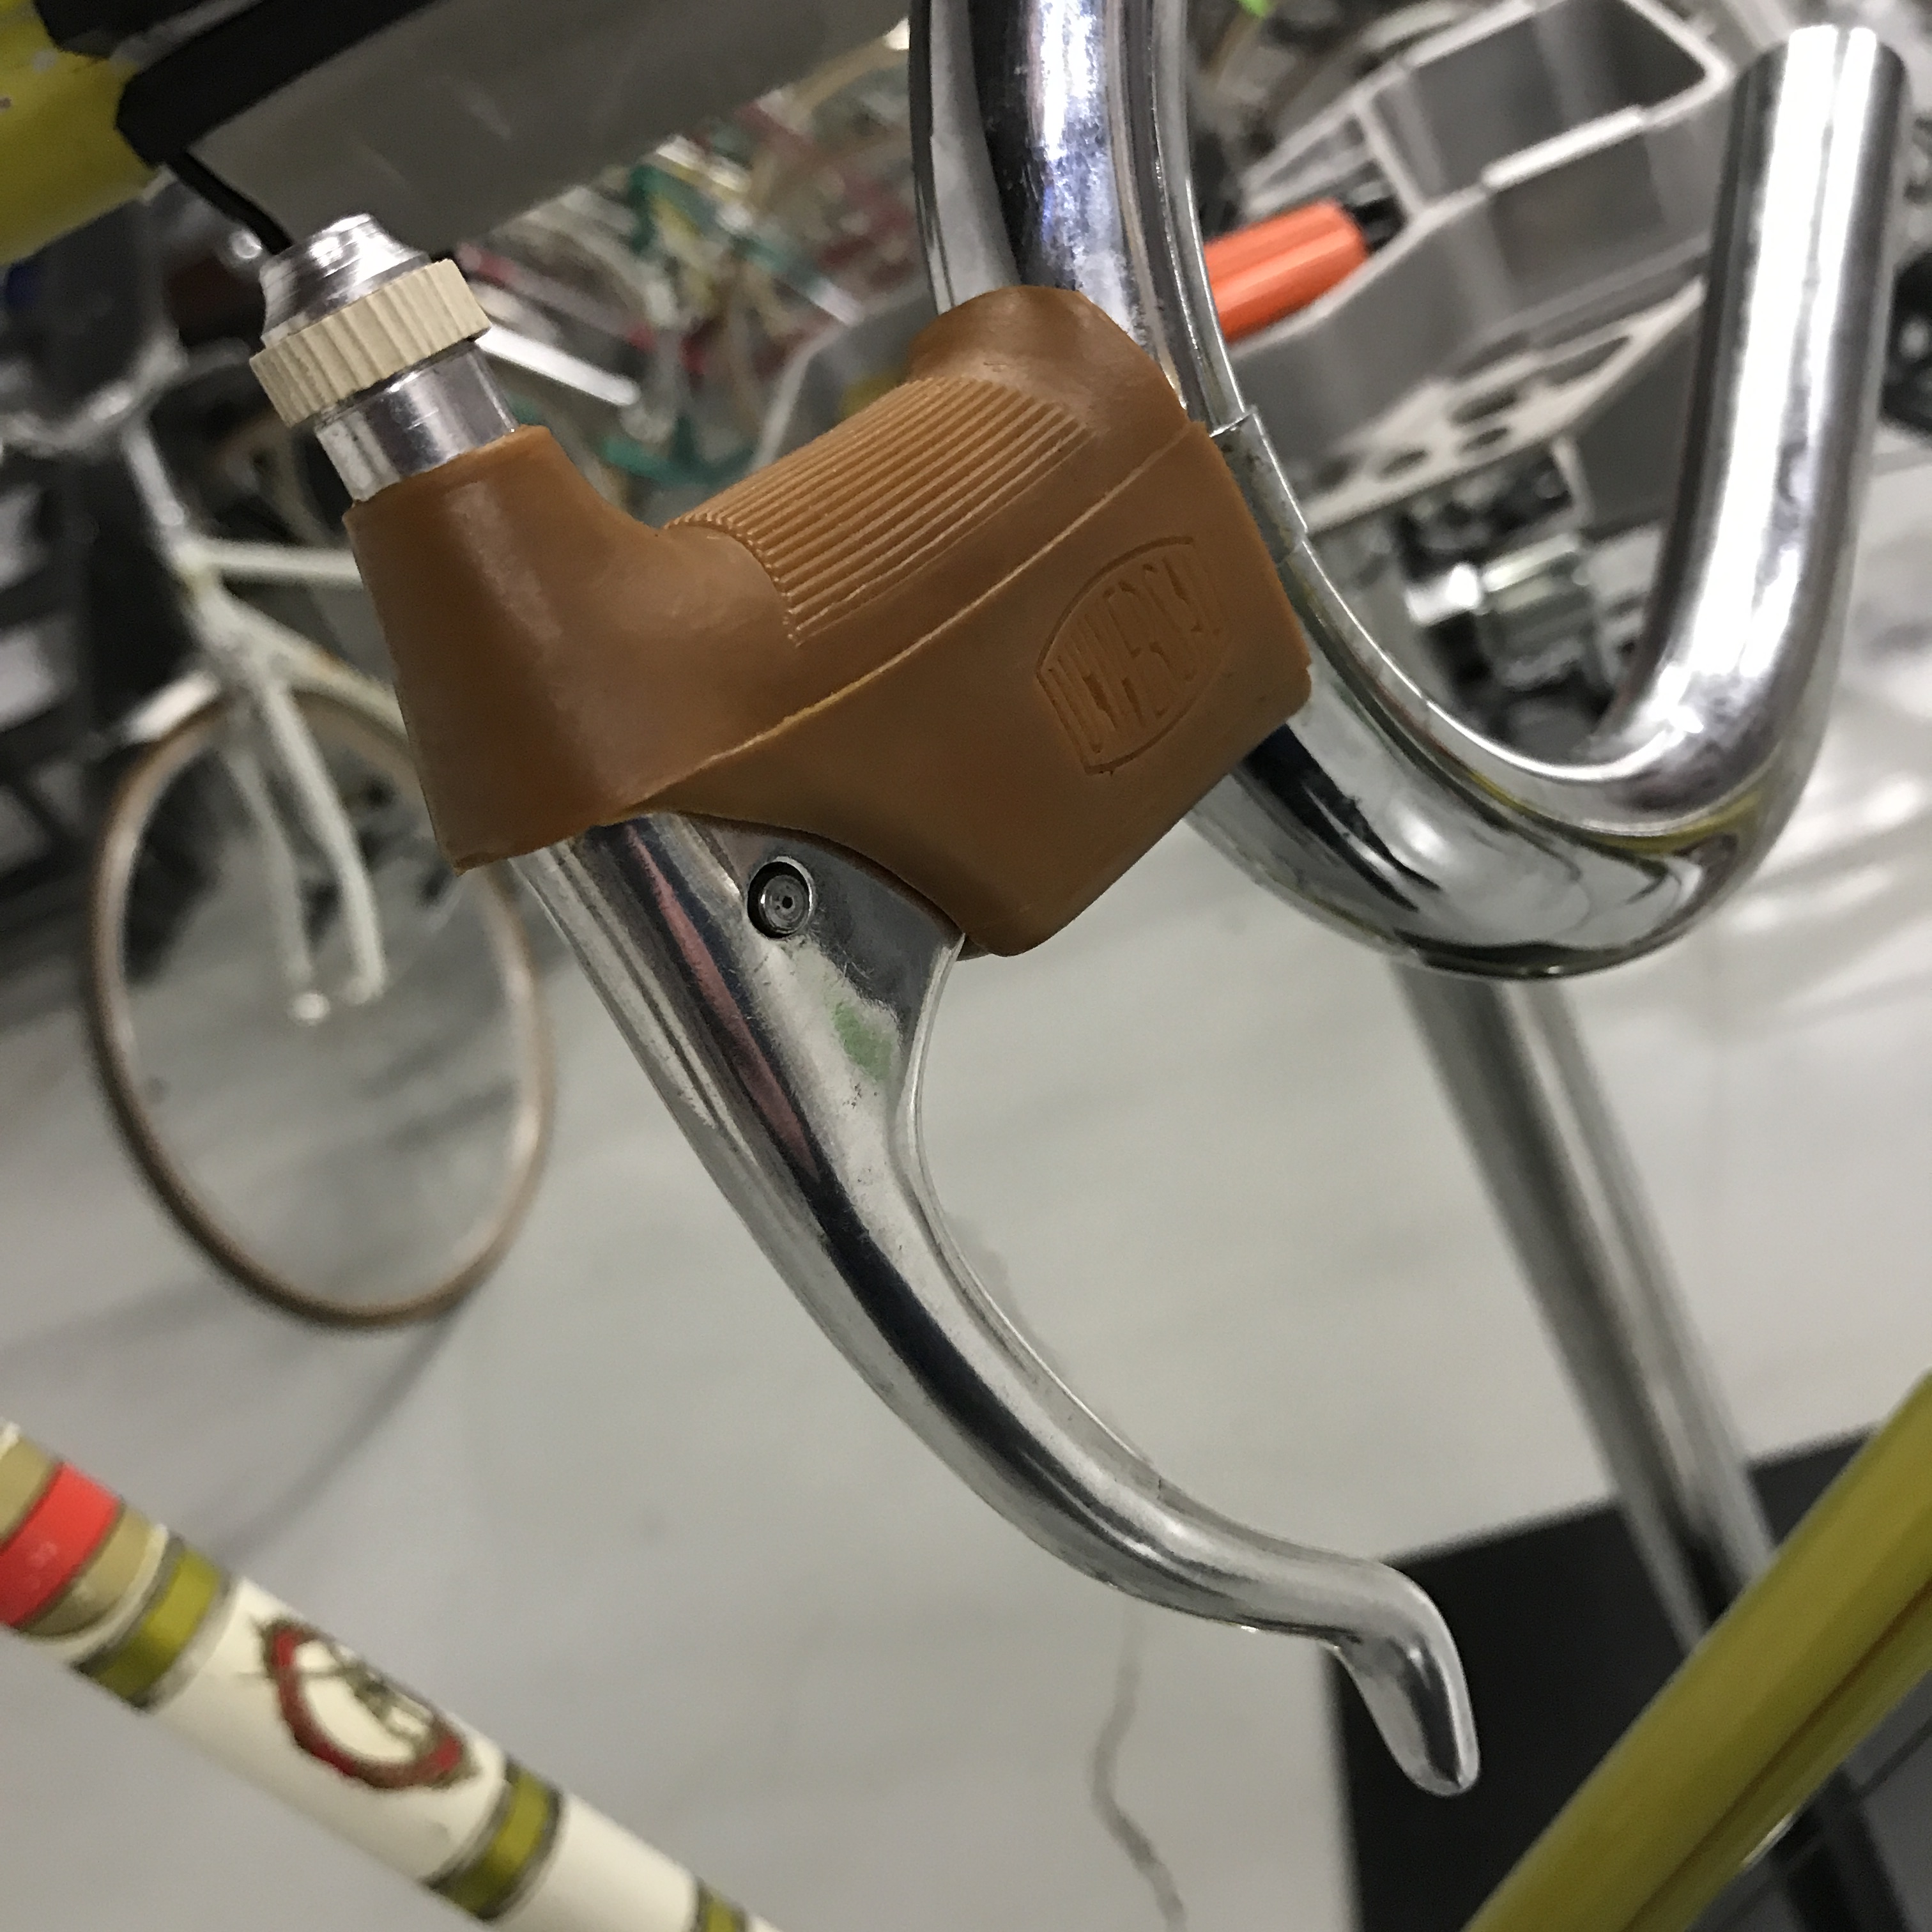
Universal Mod.51 brake levers with pointy ends and the serrated rubber adjustment ring. The rubber adjustment ring was not very durable and it was replaced with a black, dome-shaped rubber cover when Universal introduced the Mod.61 centerpull brakes in 1961. The pointy ends on the brake levers were also rounded off with the Mod.61 introduction.


Universal Mod.51 brake callipers. These callipers are pretty bulletproof and usually clean up well unless they have been severely abused.
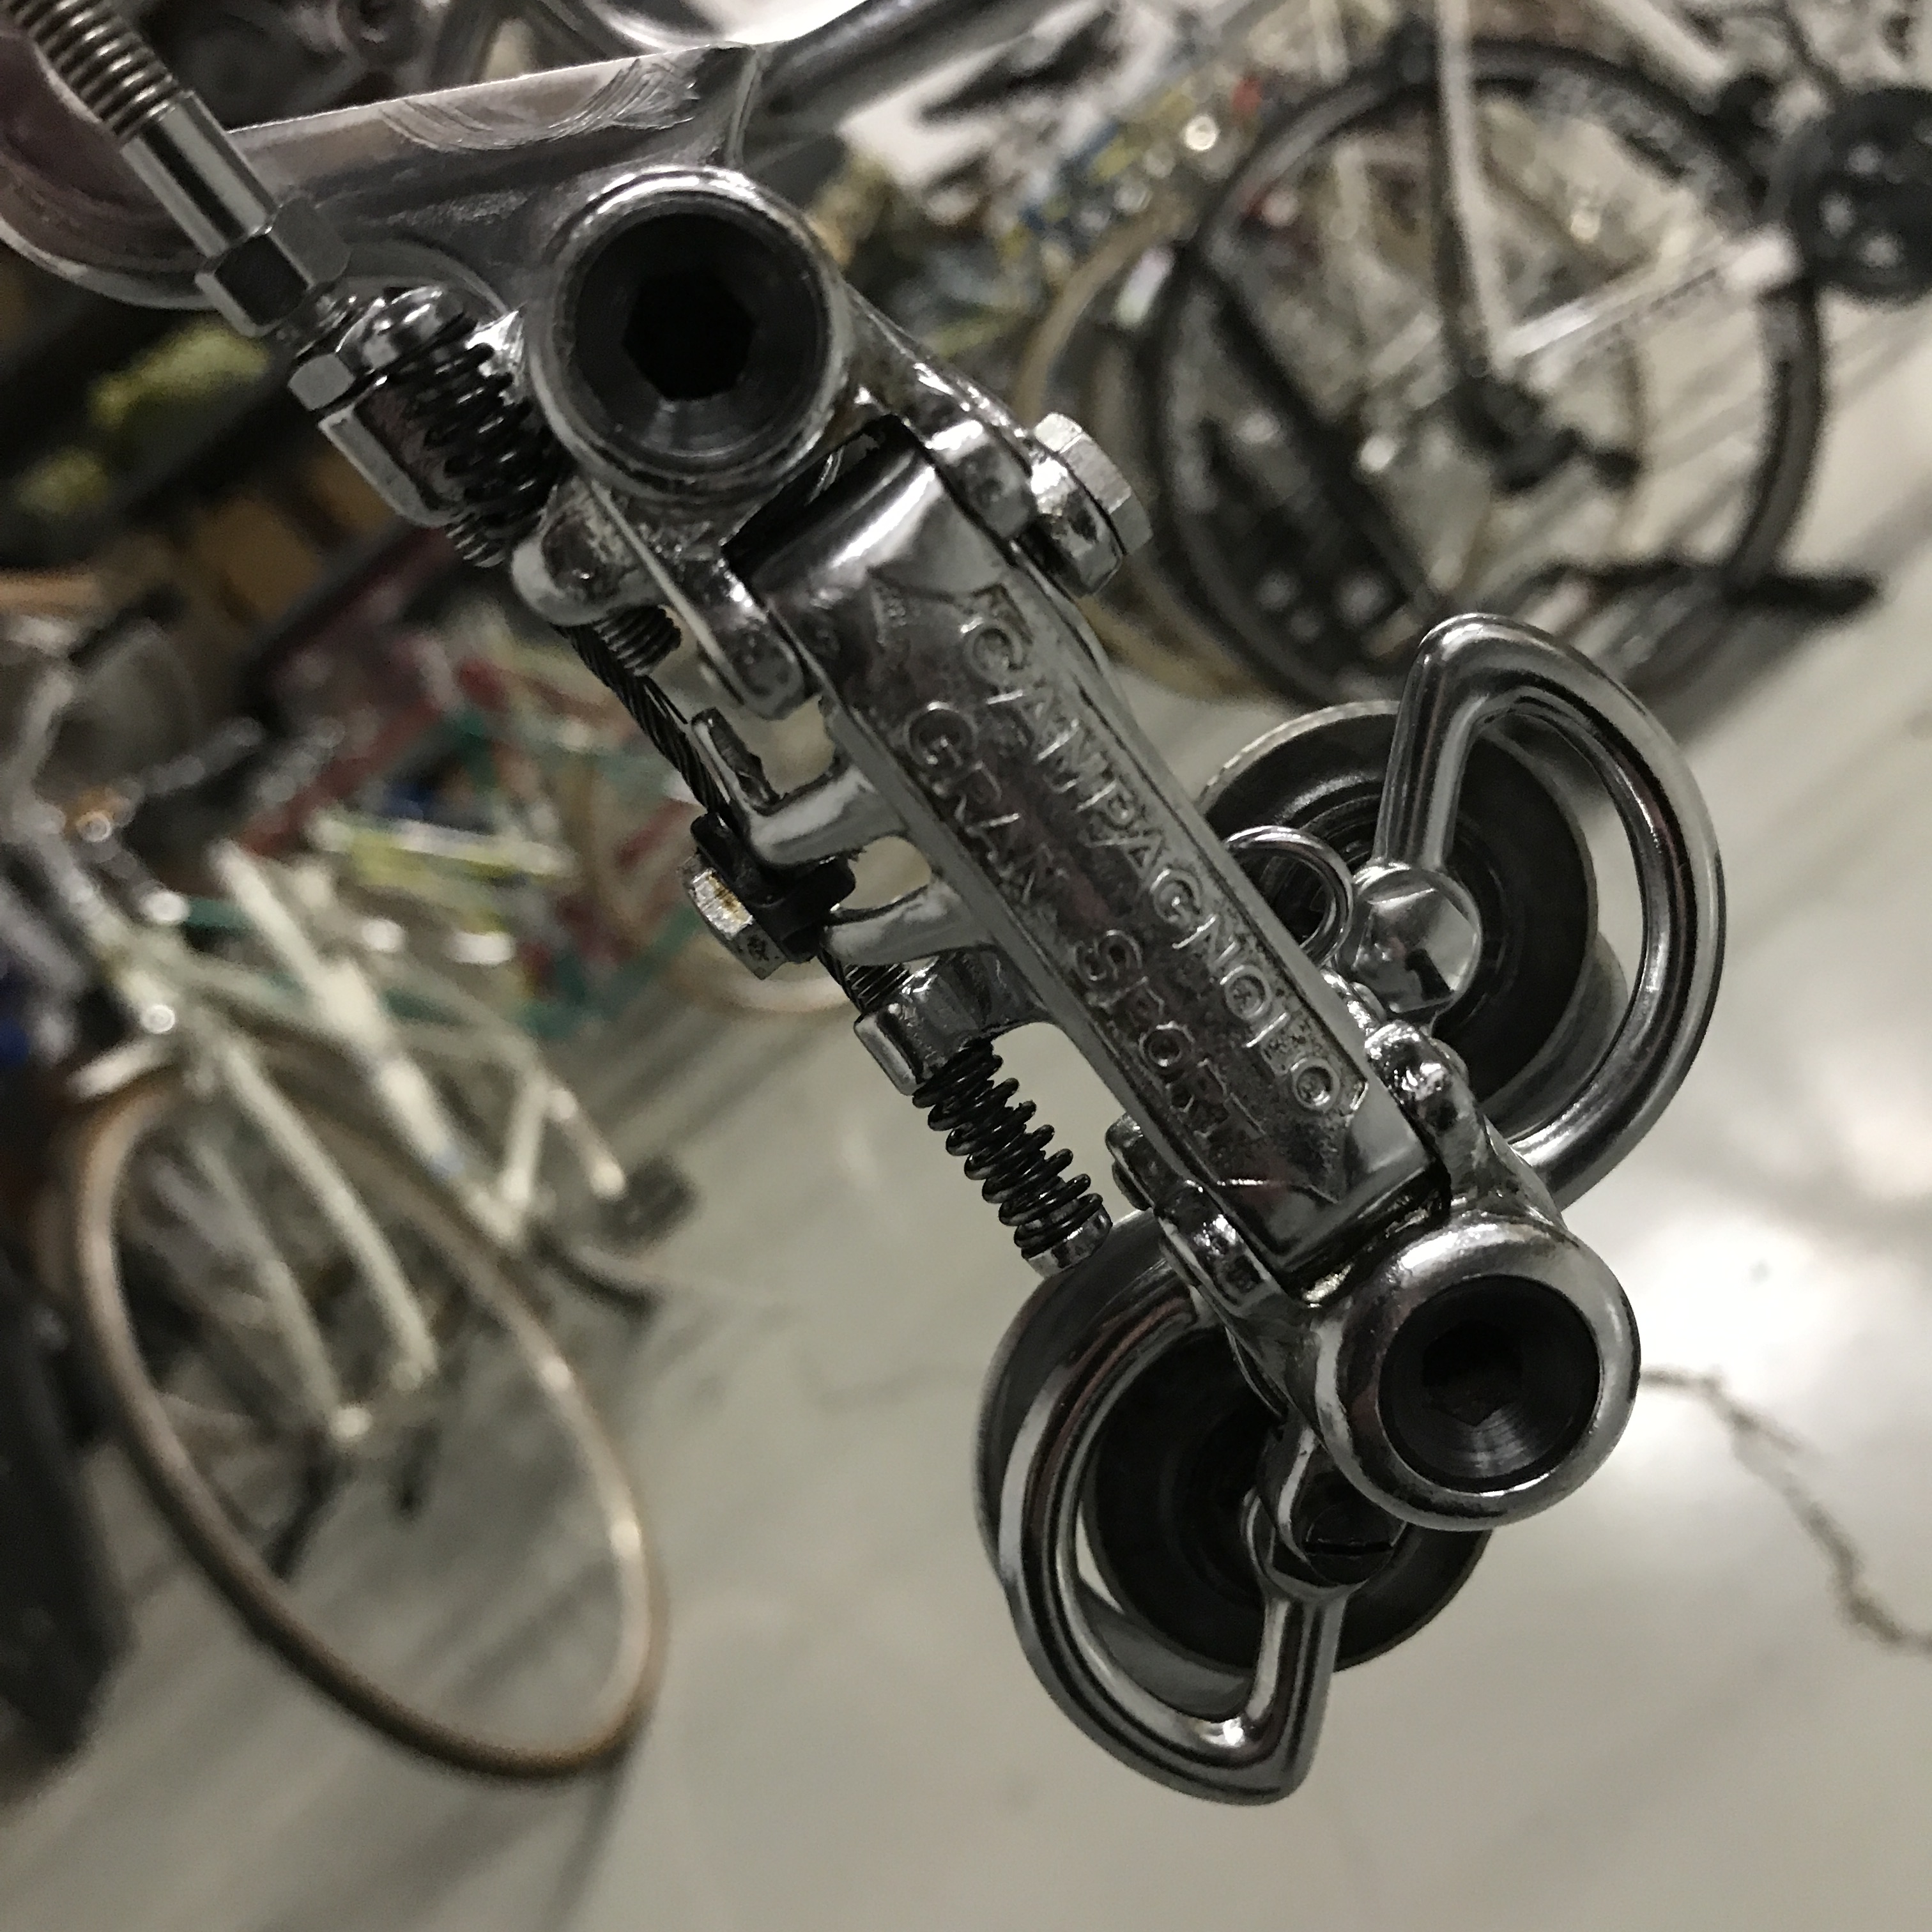
Campagnolo Gran Sport rear derailleur (v.4)
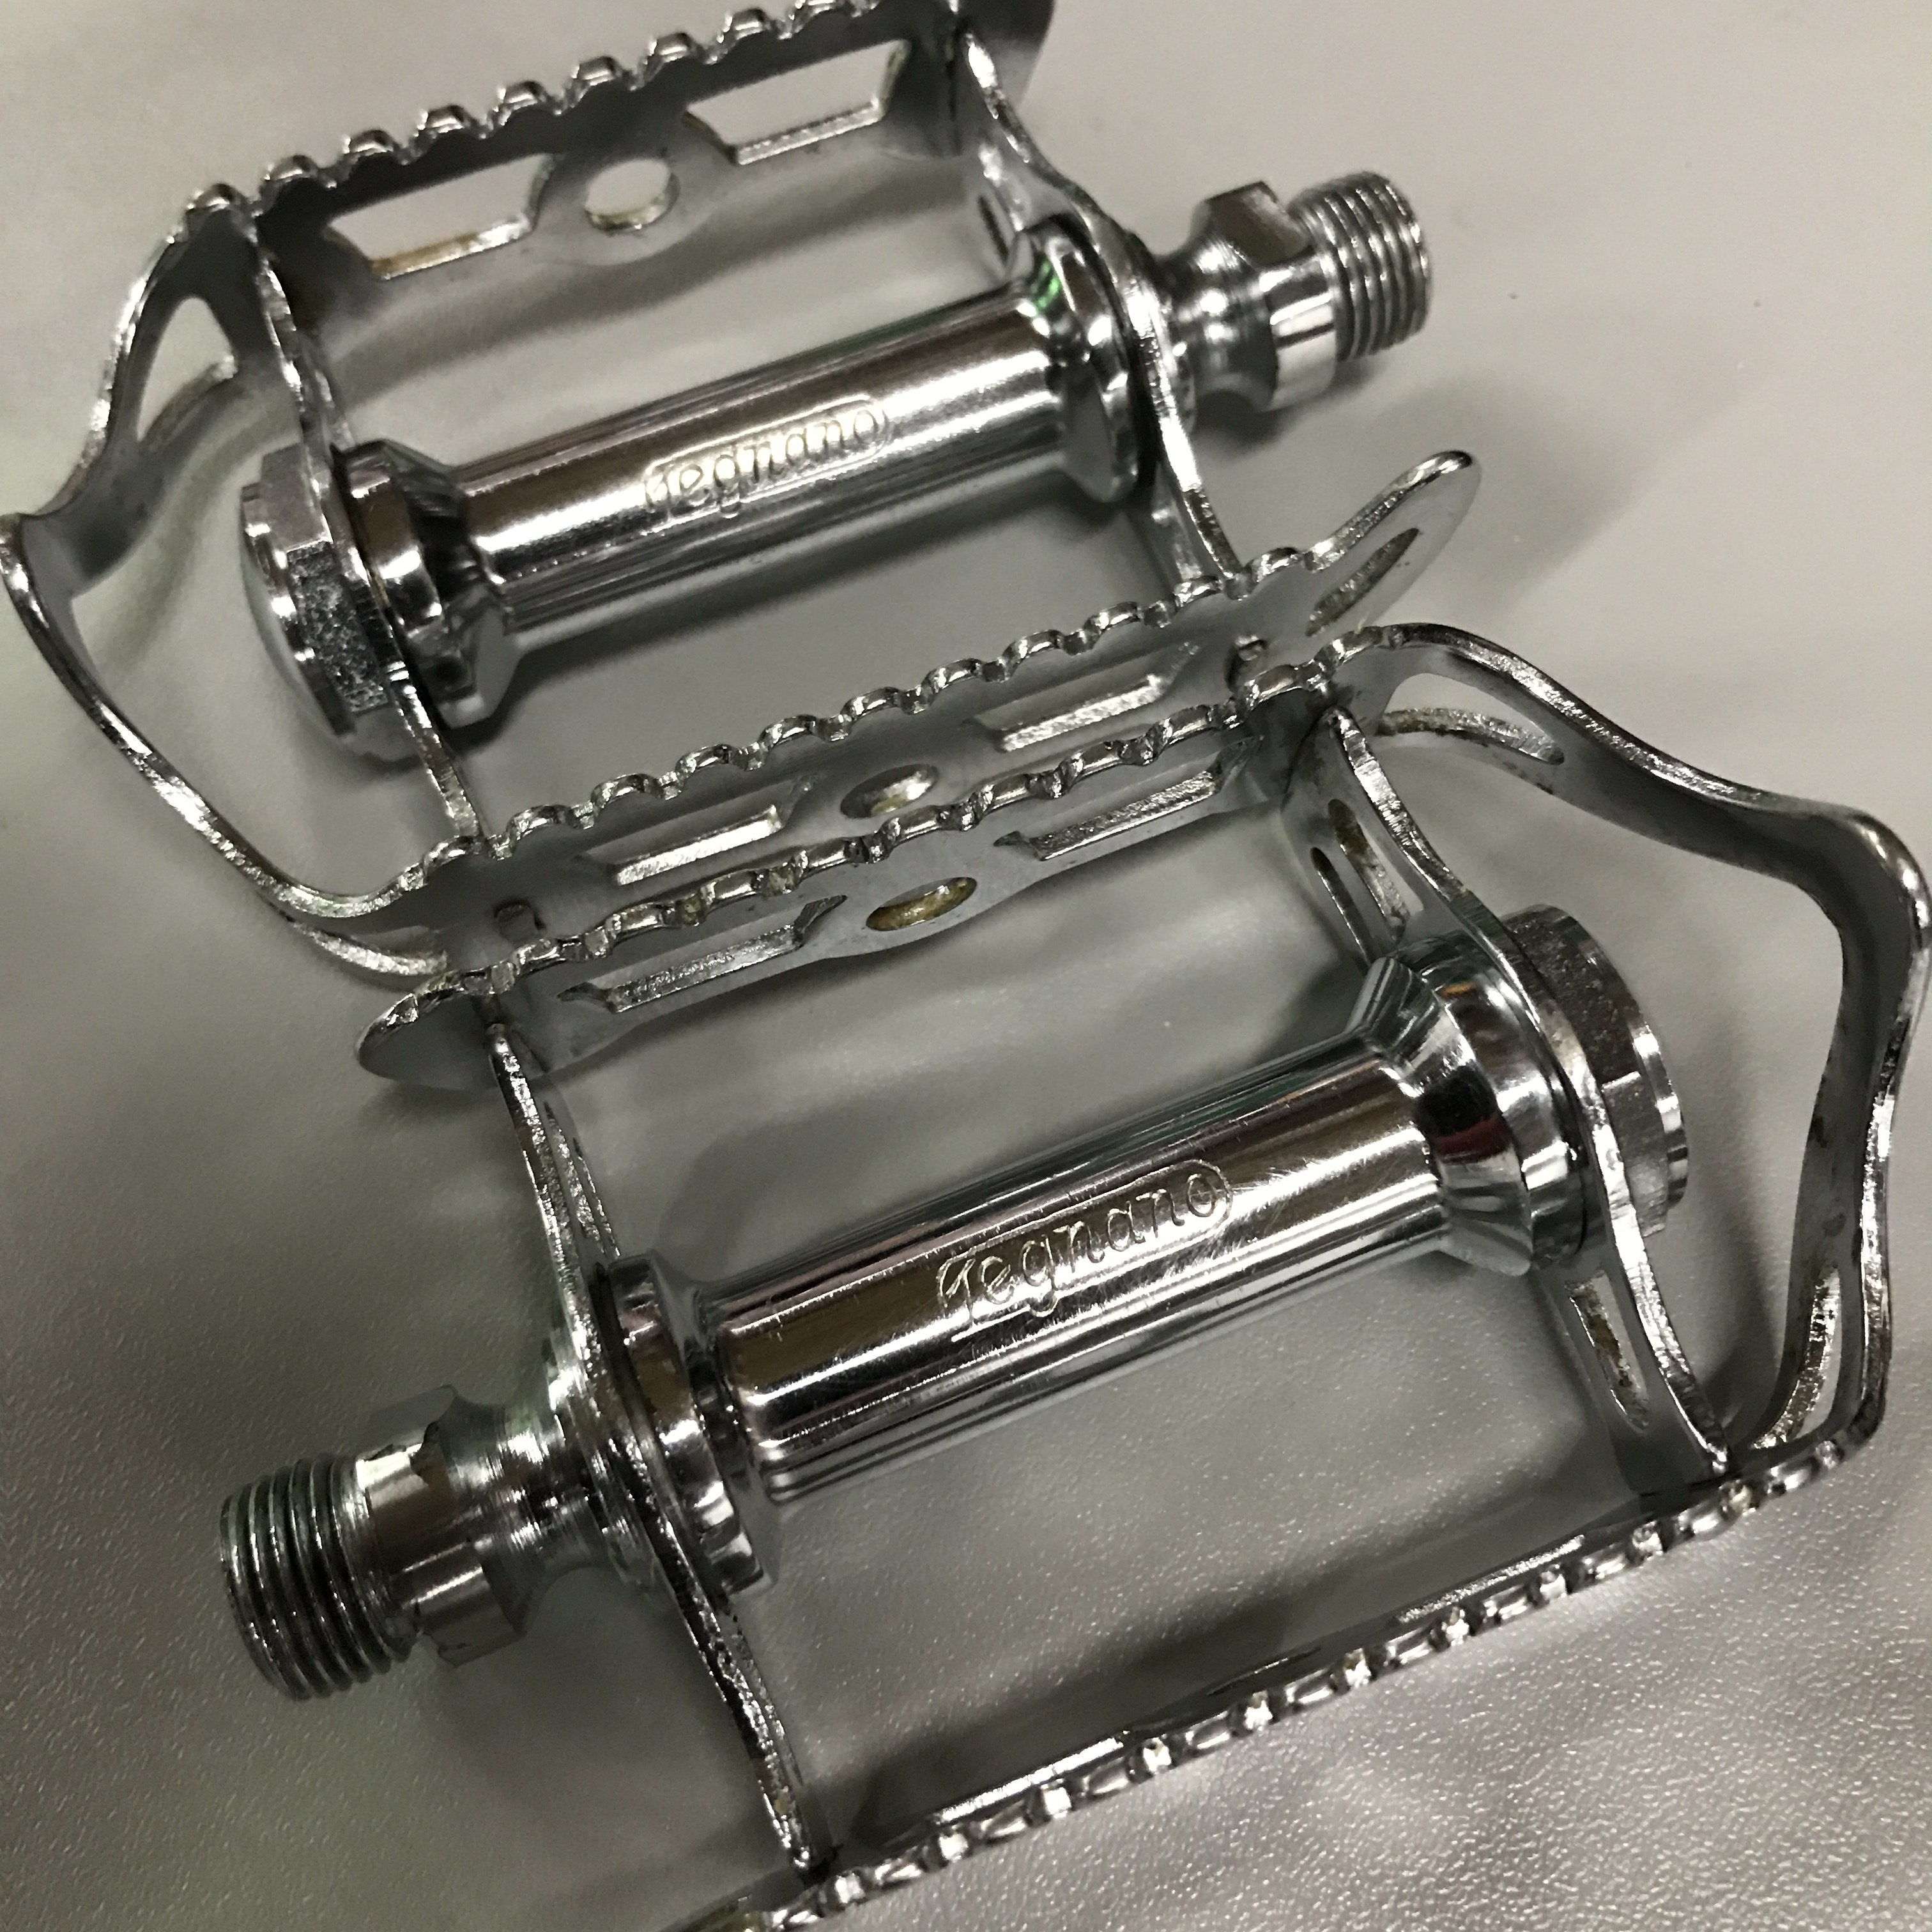
Way-Assauto ‘Sprint’ pedals branded for Legnano. Interesting to note that Way-Assauto produced the first pedal branded for Campagnolo prior to Campy setting up their own production.
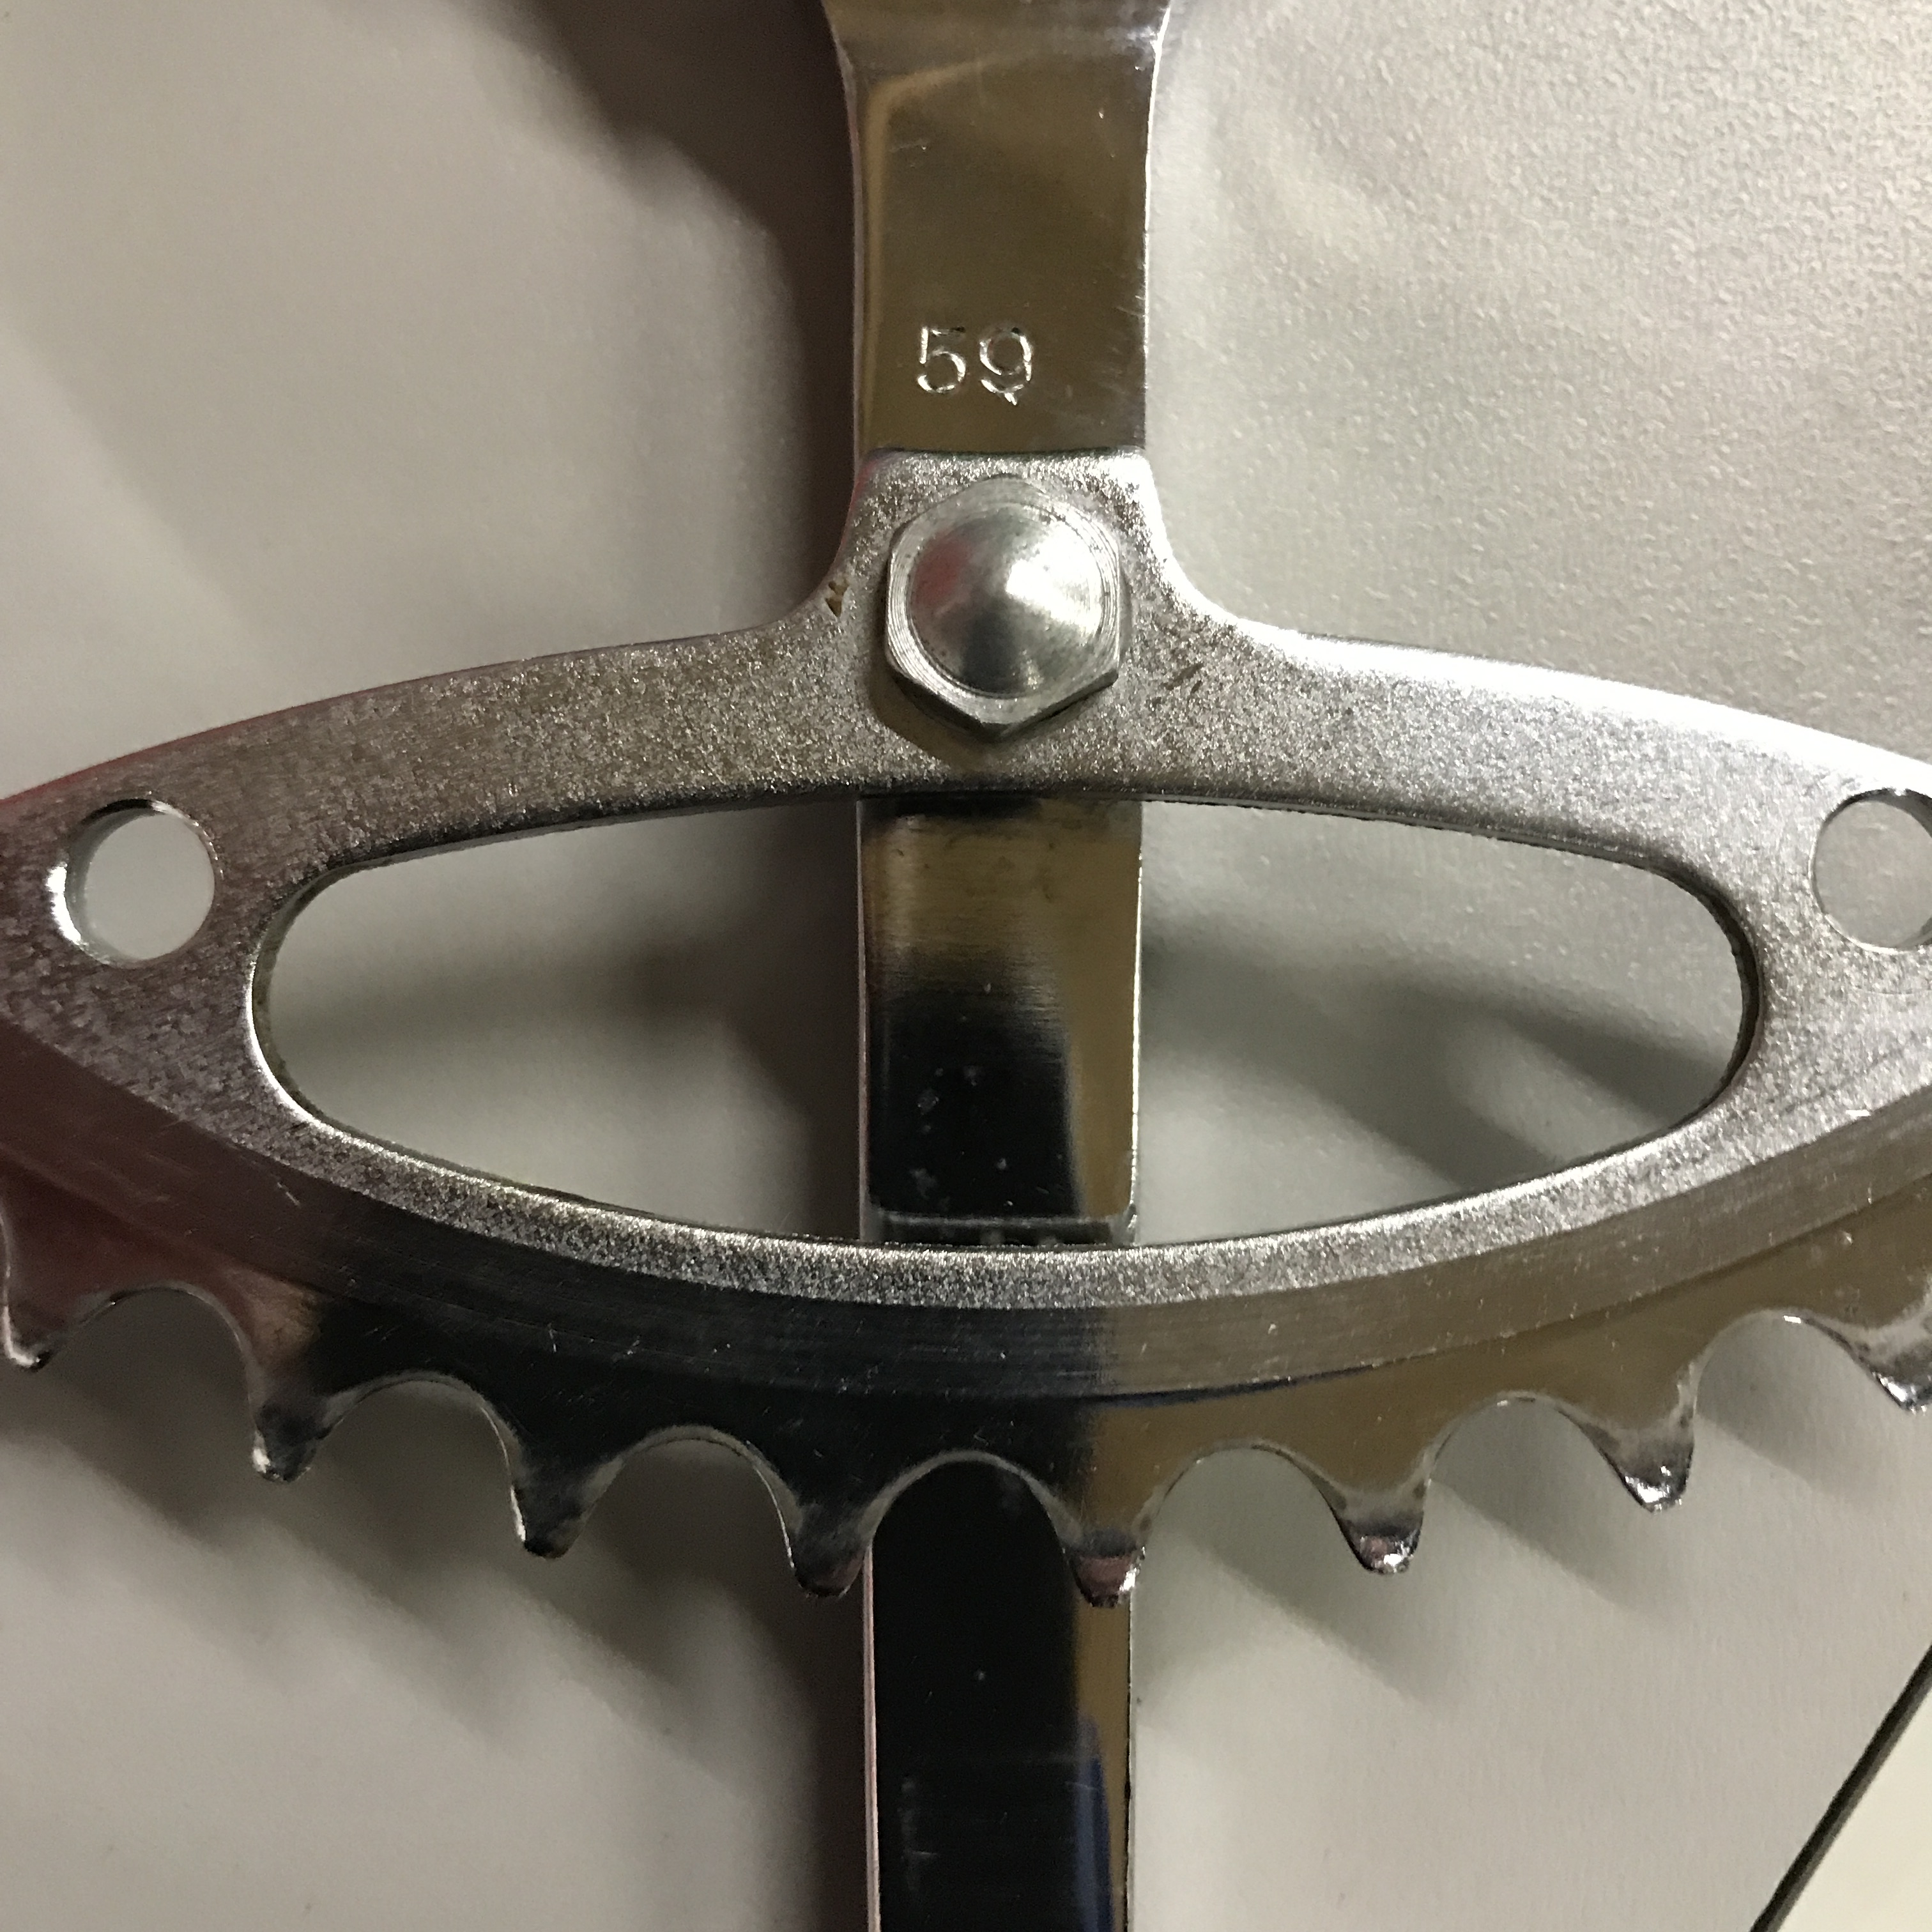
Matching 1959 date stamps on the inside of the crank arms.
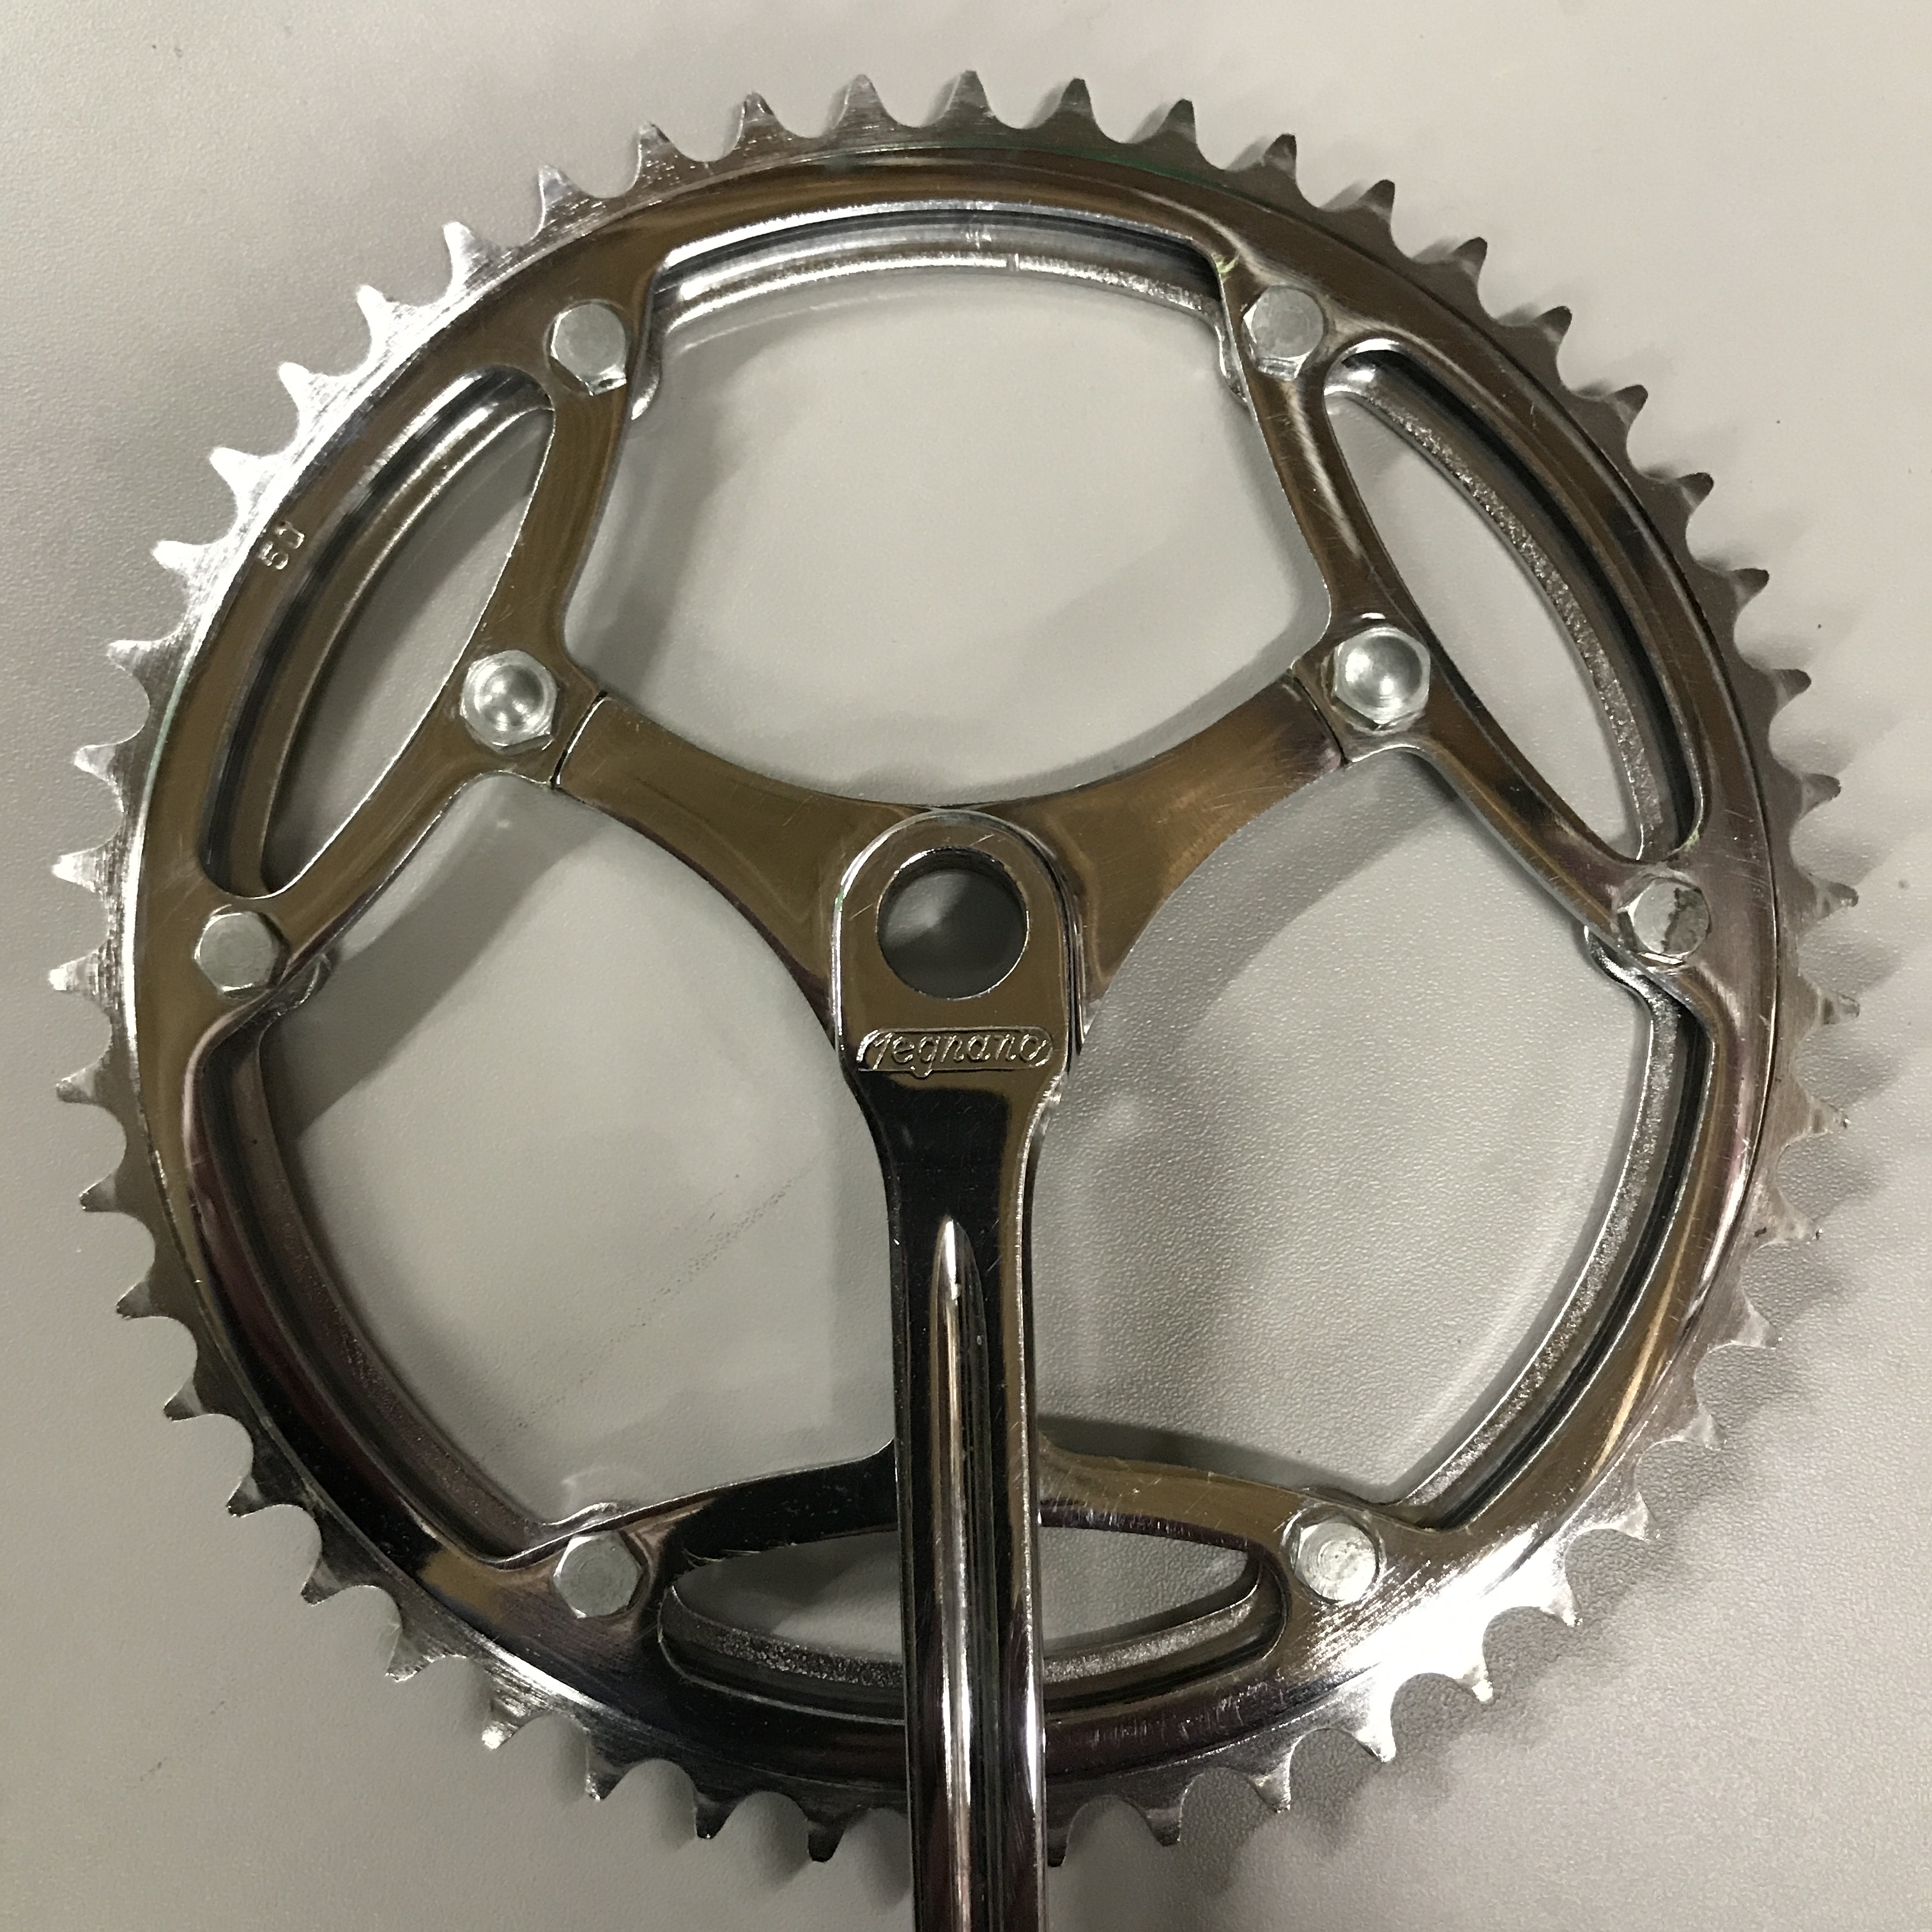
Way-Assauto cranks branded for Legnano with 50/47 chain rings (half step gearing).
Way-Assauto bottom bracket and factory cotter pins. After the spindle was forged, a countersunk hole was machined into each end prior to hardening. After hardening and annealing, the spindle was fixed between centers on a circular grinder so that the crank arm faces and bearing surfaces could be ground true and concentric to align with the bottom bracket cups.
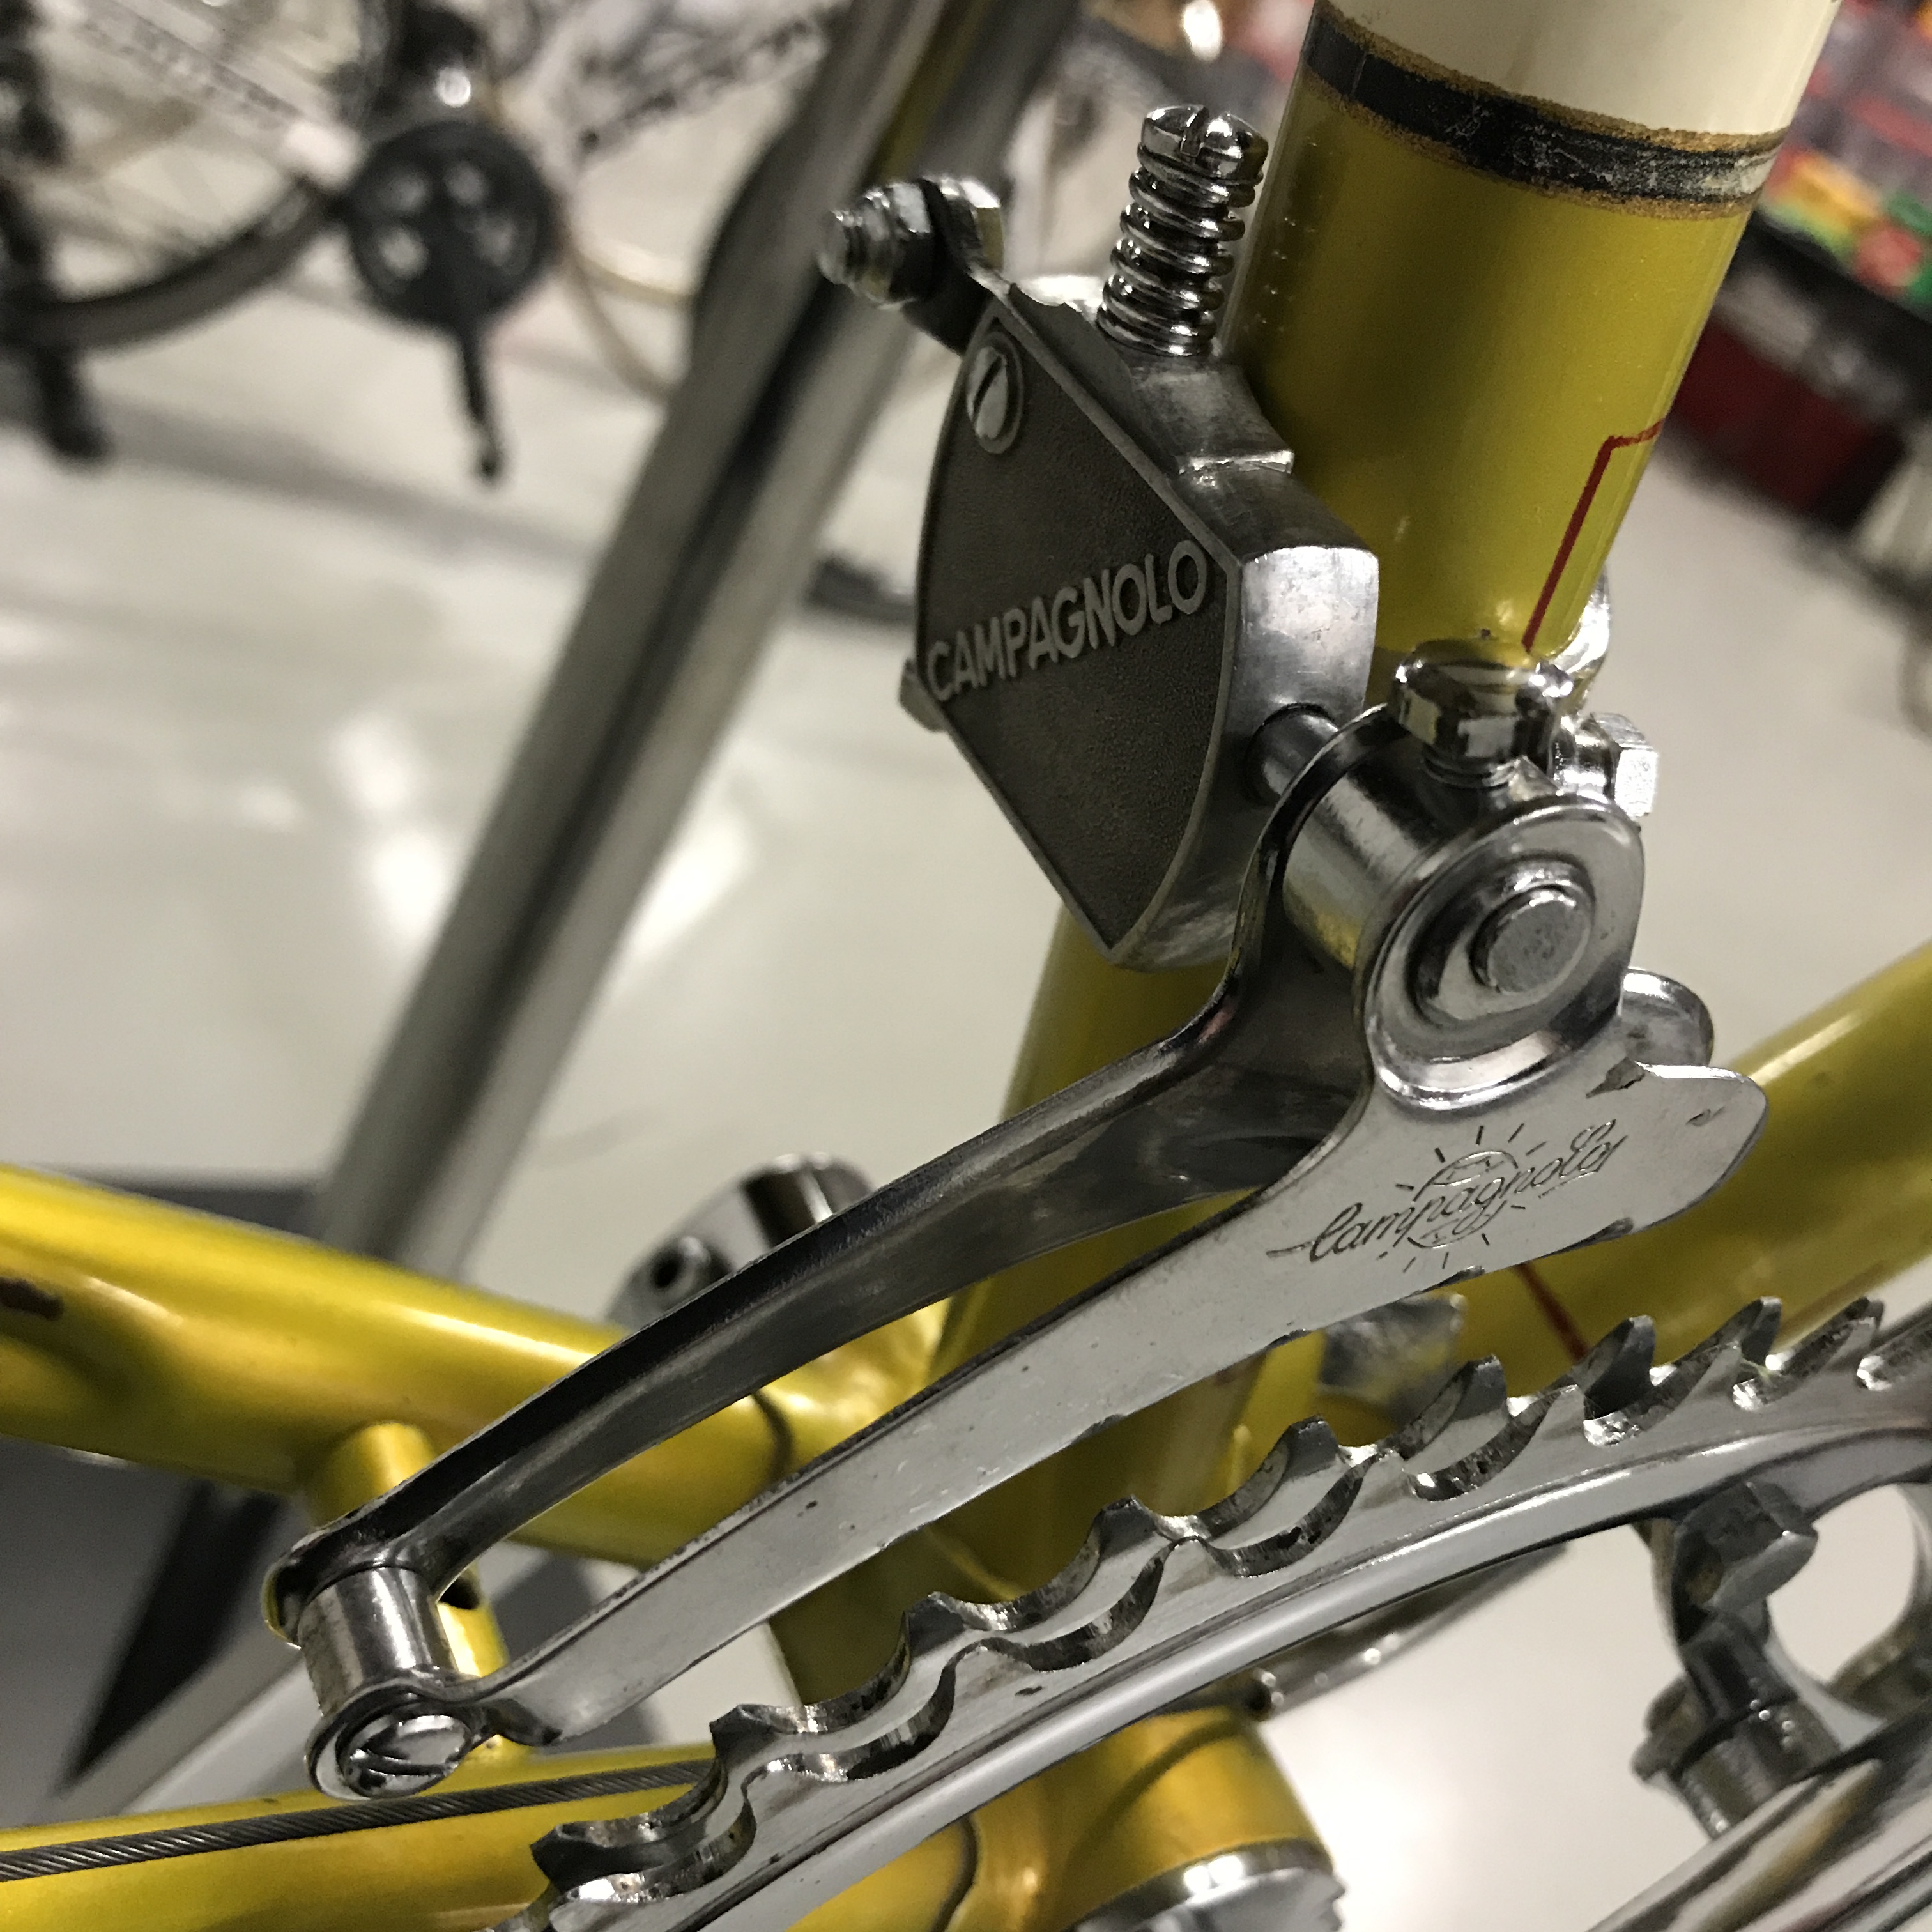
The Campagnolo Gran Sport ‘plunger-style’ front derailleur. A bit of a ‘kitschy’ part in my opinion but it worked ok on a short jump (in this case 47/50T) and it was in production for about 20 years, finishing its days as part of the Valentino group.
However the ‘Matchbox’, as it is often called, has never been a favourite of mine and were I not bent on keeping this Gran Premio completely original, I would replace it with the Record front derailleur (part no. 1052/1) that Campagnolo introduced in 1958.

Here is a blueprint of the bike:
Model: Gran Premio
Year: 1959
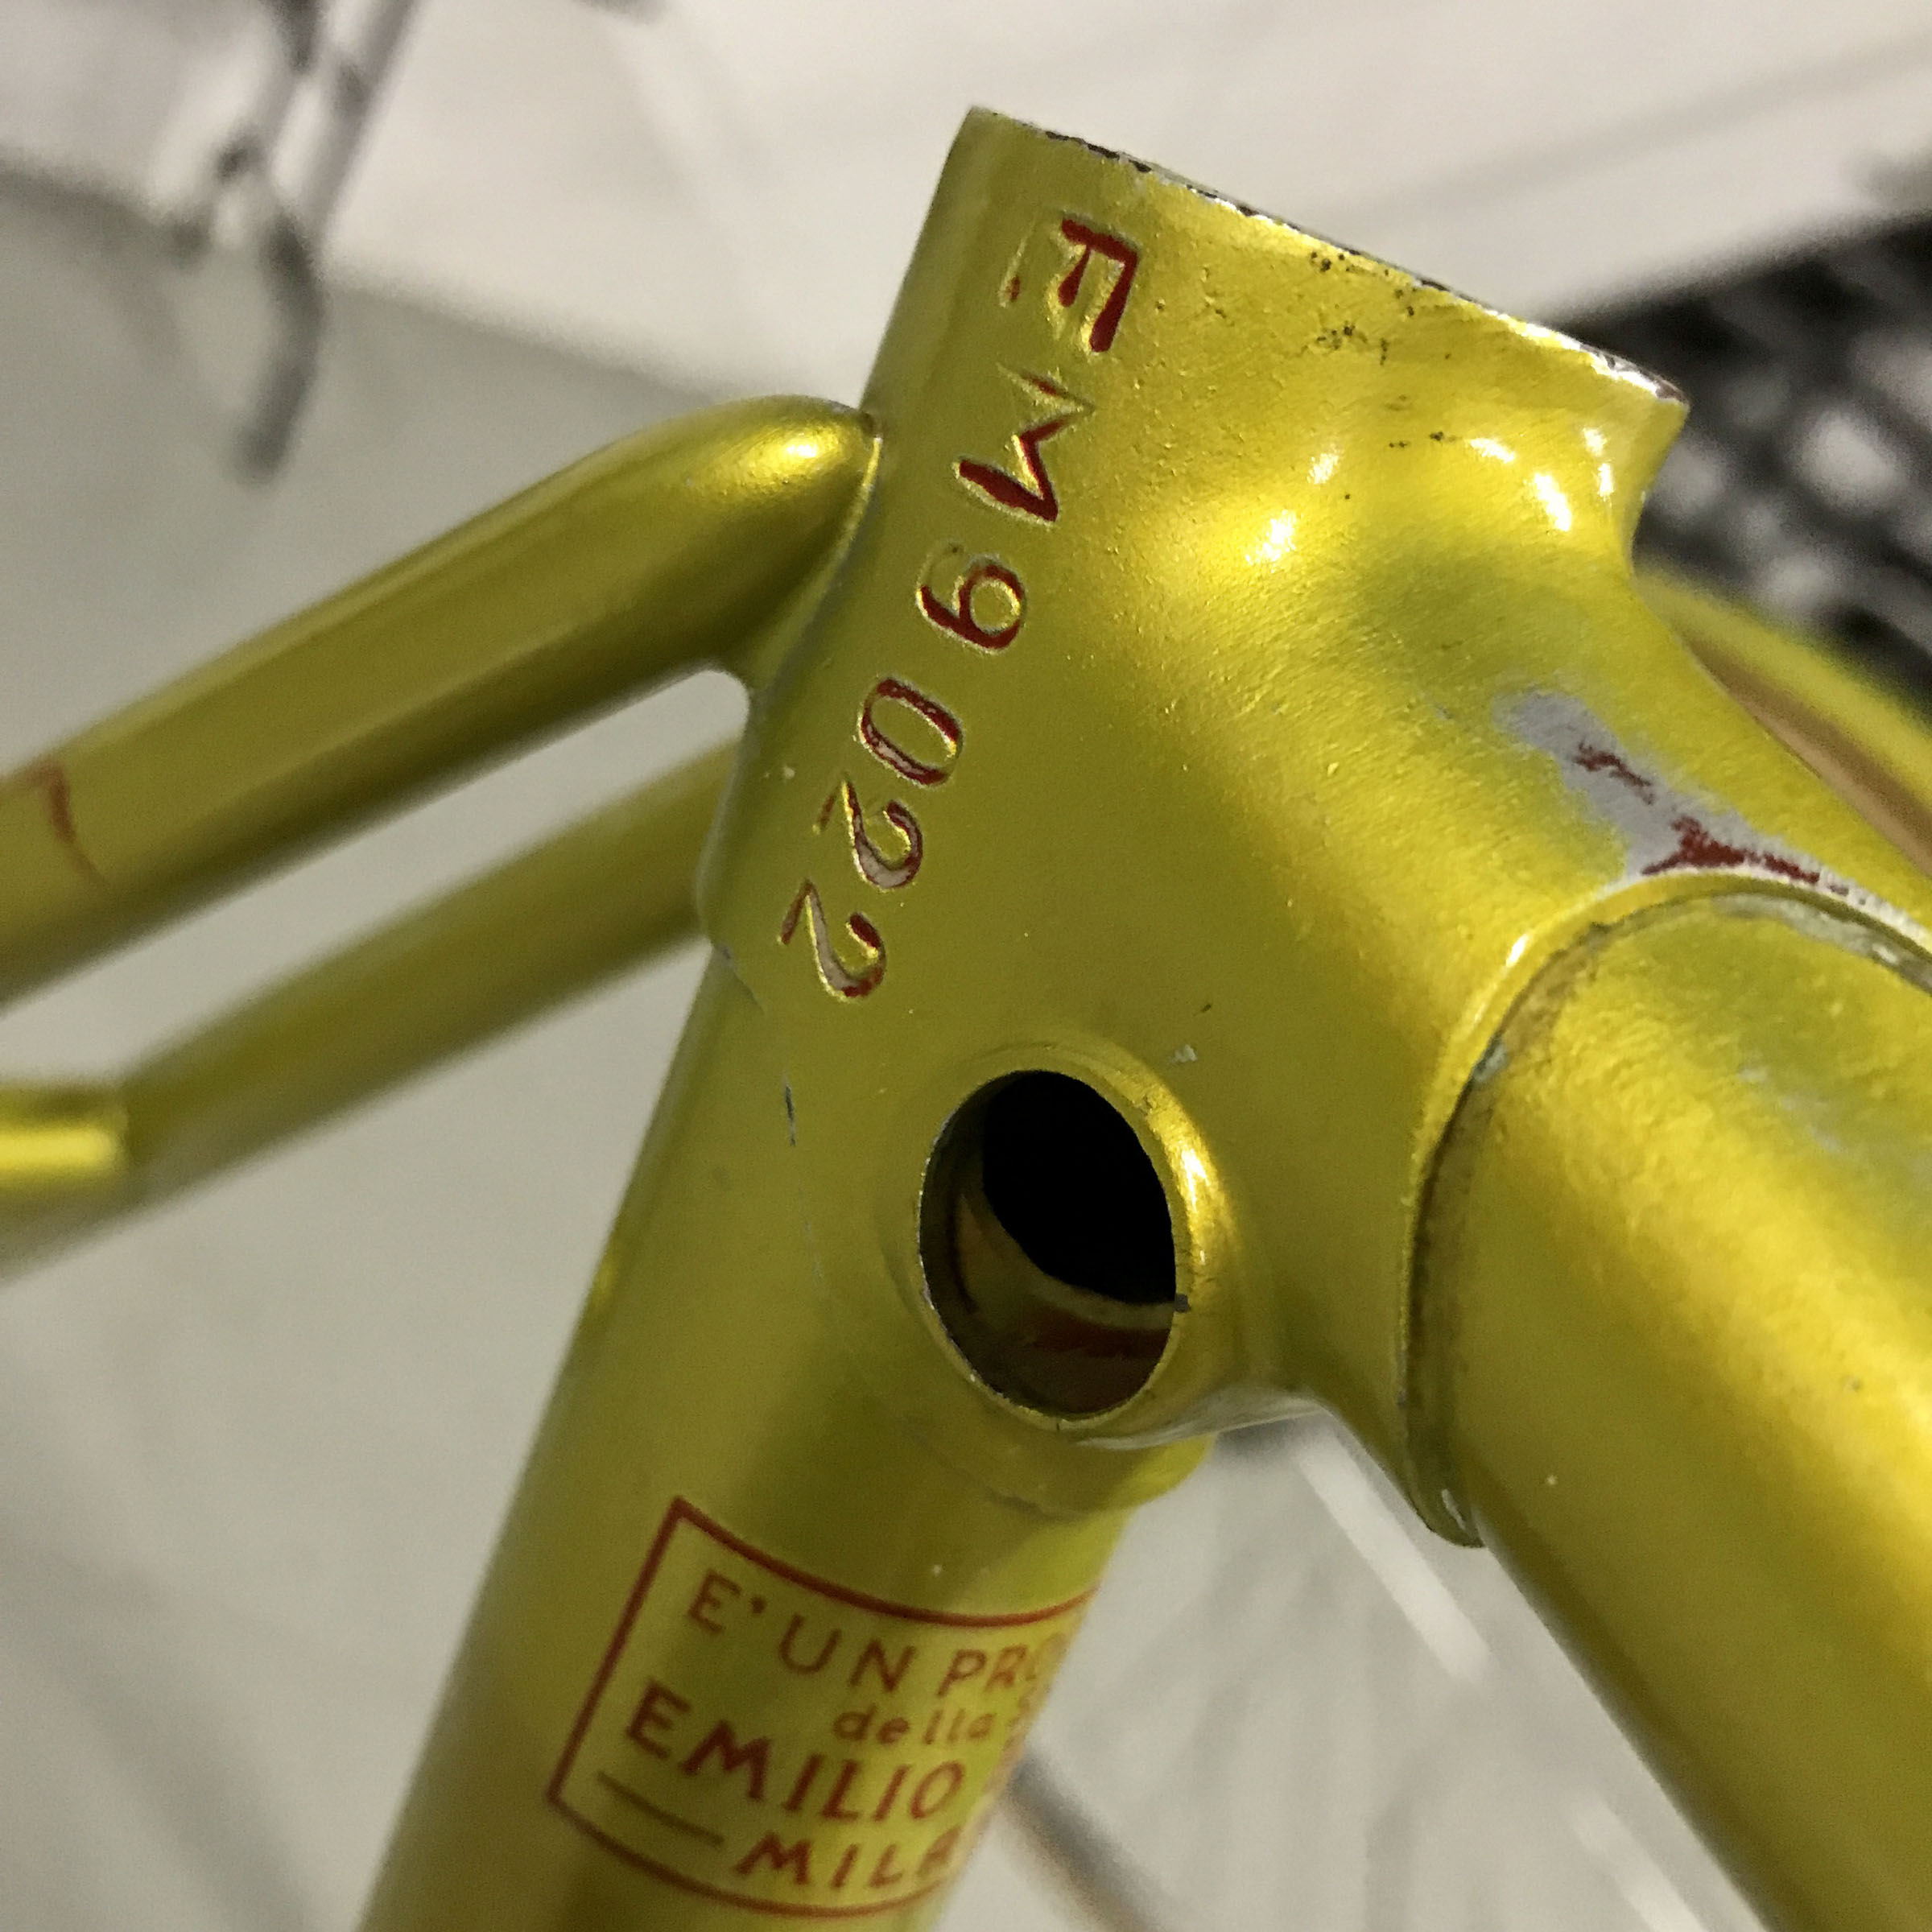
Serial No: EM9022 (stamped vertically on right side of the seat lug)
Frame Size: 56cm (ctc)
Frame Weight: 3.290kg or 7.25lbs (no headset, seat post bolt or bb)
Total Weight: tba
Tubing: Falck Precizione
Rear Dropouts: Campagnolo 1010
Front Dropouts: Forged, not branded
Crankset: Way-Assauto ‘Y’ format 50/47 (stamped 59 on inside of the arms)
Bottom Bracket: Way-Assauto (70mm)
Pedals: Way-Assauto Sprint branded for Legnano – short spindle thread
Toe Clips: Christophe Special (nos) first release
Toe Straps: Christophe
Front Derailleur: Campagnolo Gran Sport 1005/2 ‘Matchbox’
Rear Derailleur: Campagnolo Gran Sport 1012/4
Shifters: Campagnolo Gran Sport 1014
Freewheel: Regina Gran Sport Corse (14-16-18-20-22) date stamp 559
Chain: Way-Assauto Zenith
Hubs: Campagnolo Sport Low Flange 1006/A 36h (stamped Legnano)
Rims: Fiamme Cerchio Elmo Green Label 700c x 36h tubular (with eyelets)
Tyres: Vittoria tubular (modern)
Handlebars: Cinelli steel for Legnano (38cm ctc)
Handlebar Stem: Cinelli steel for Legnano (100mm)
Handlebar End Plugs: Gaslo for Legnano in aluminium
Handlebar Tape: Velox Tressostar
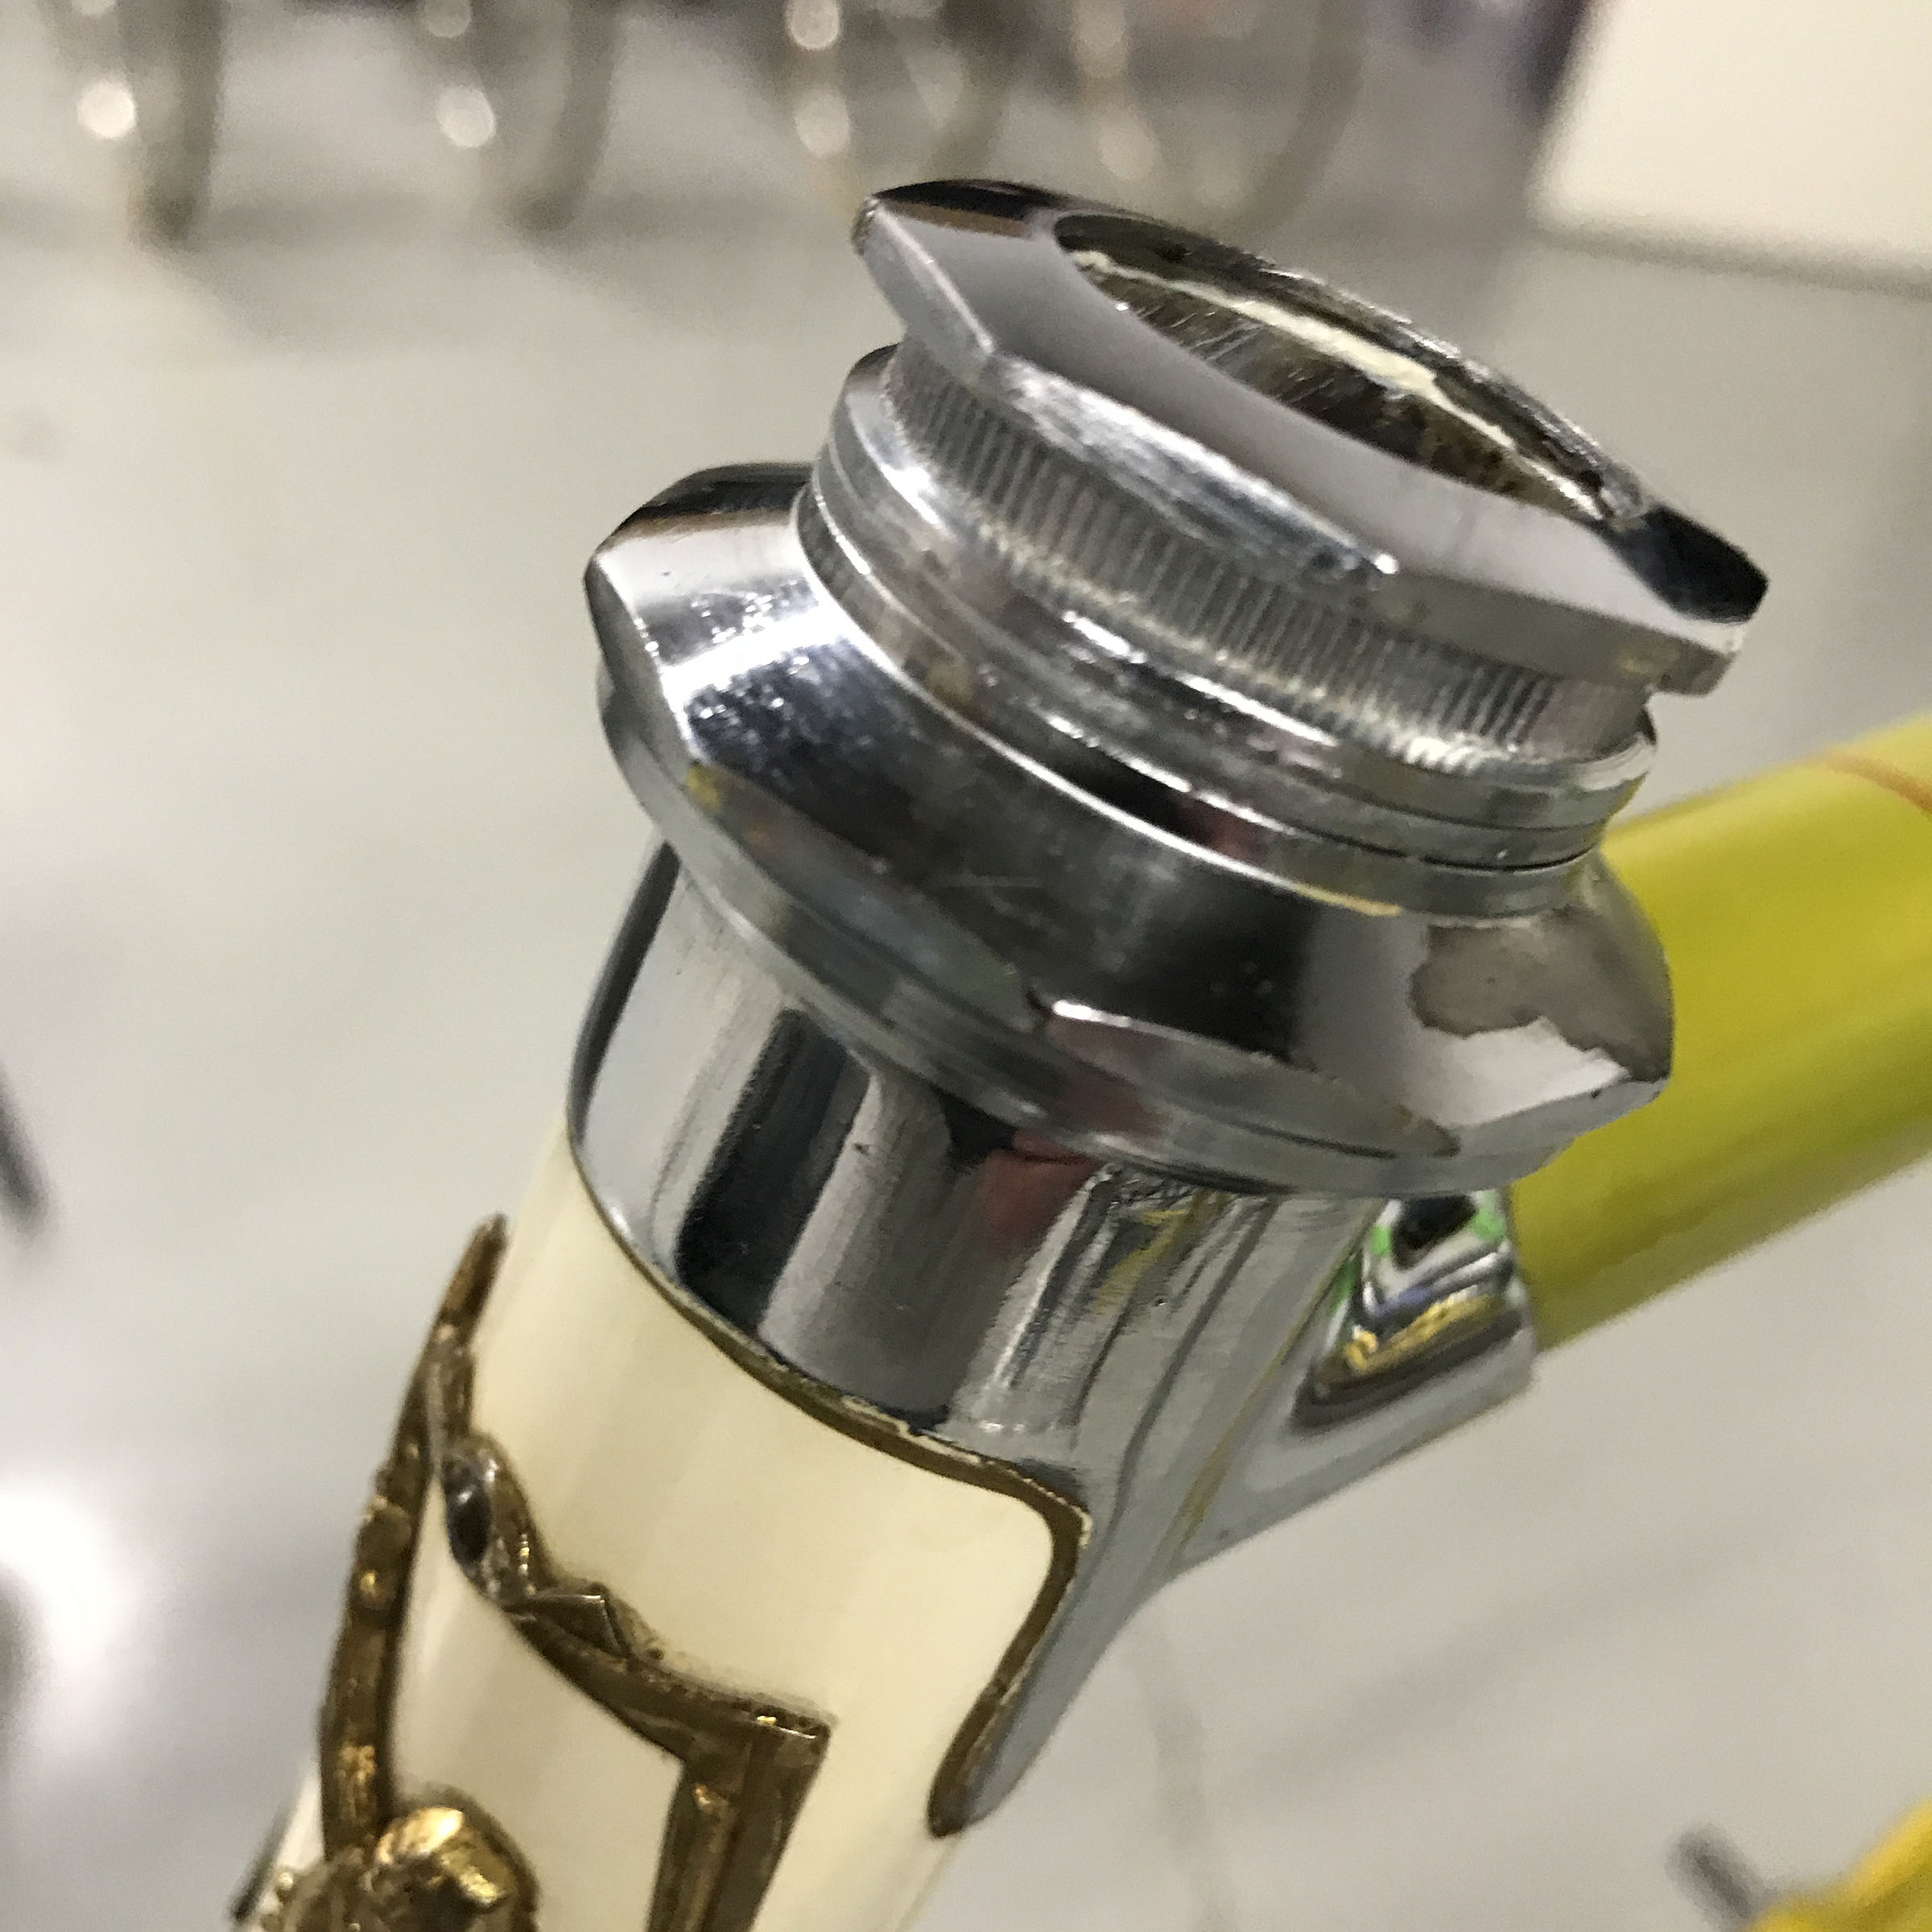
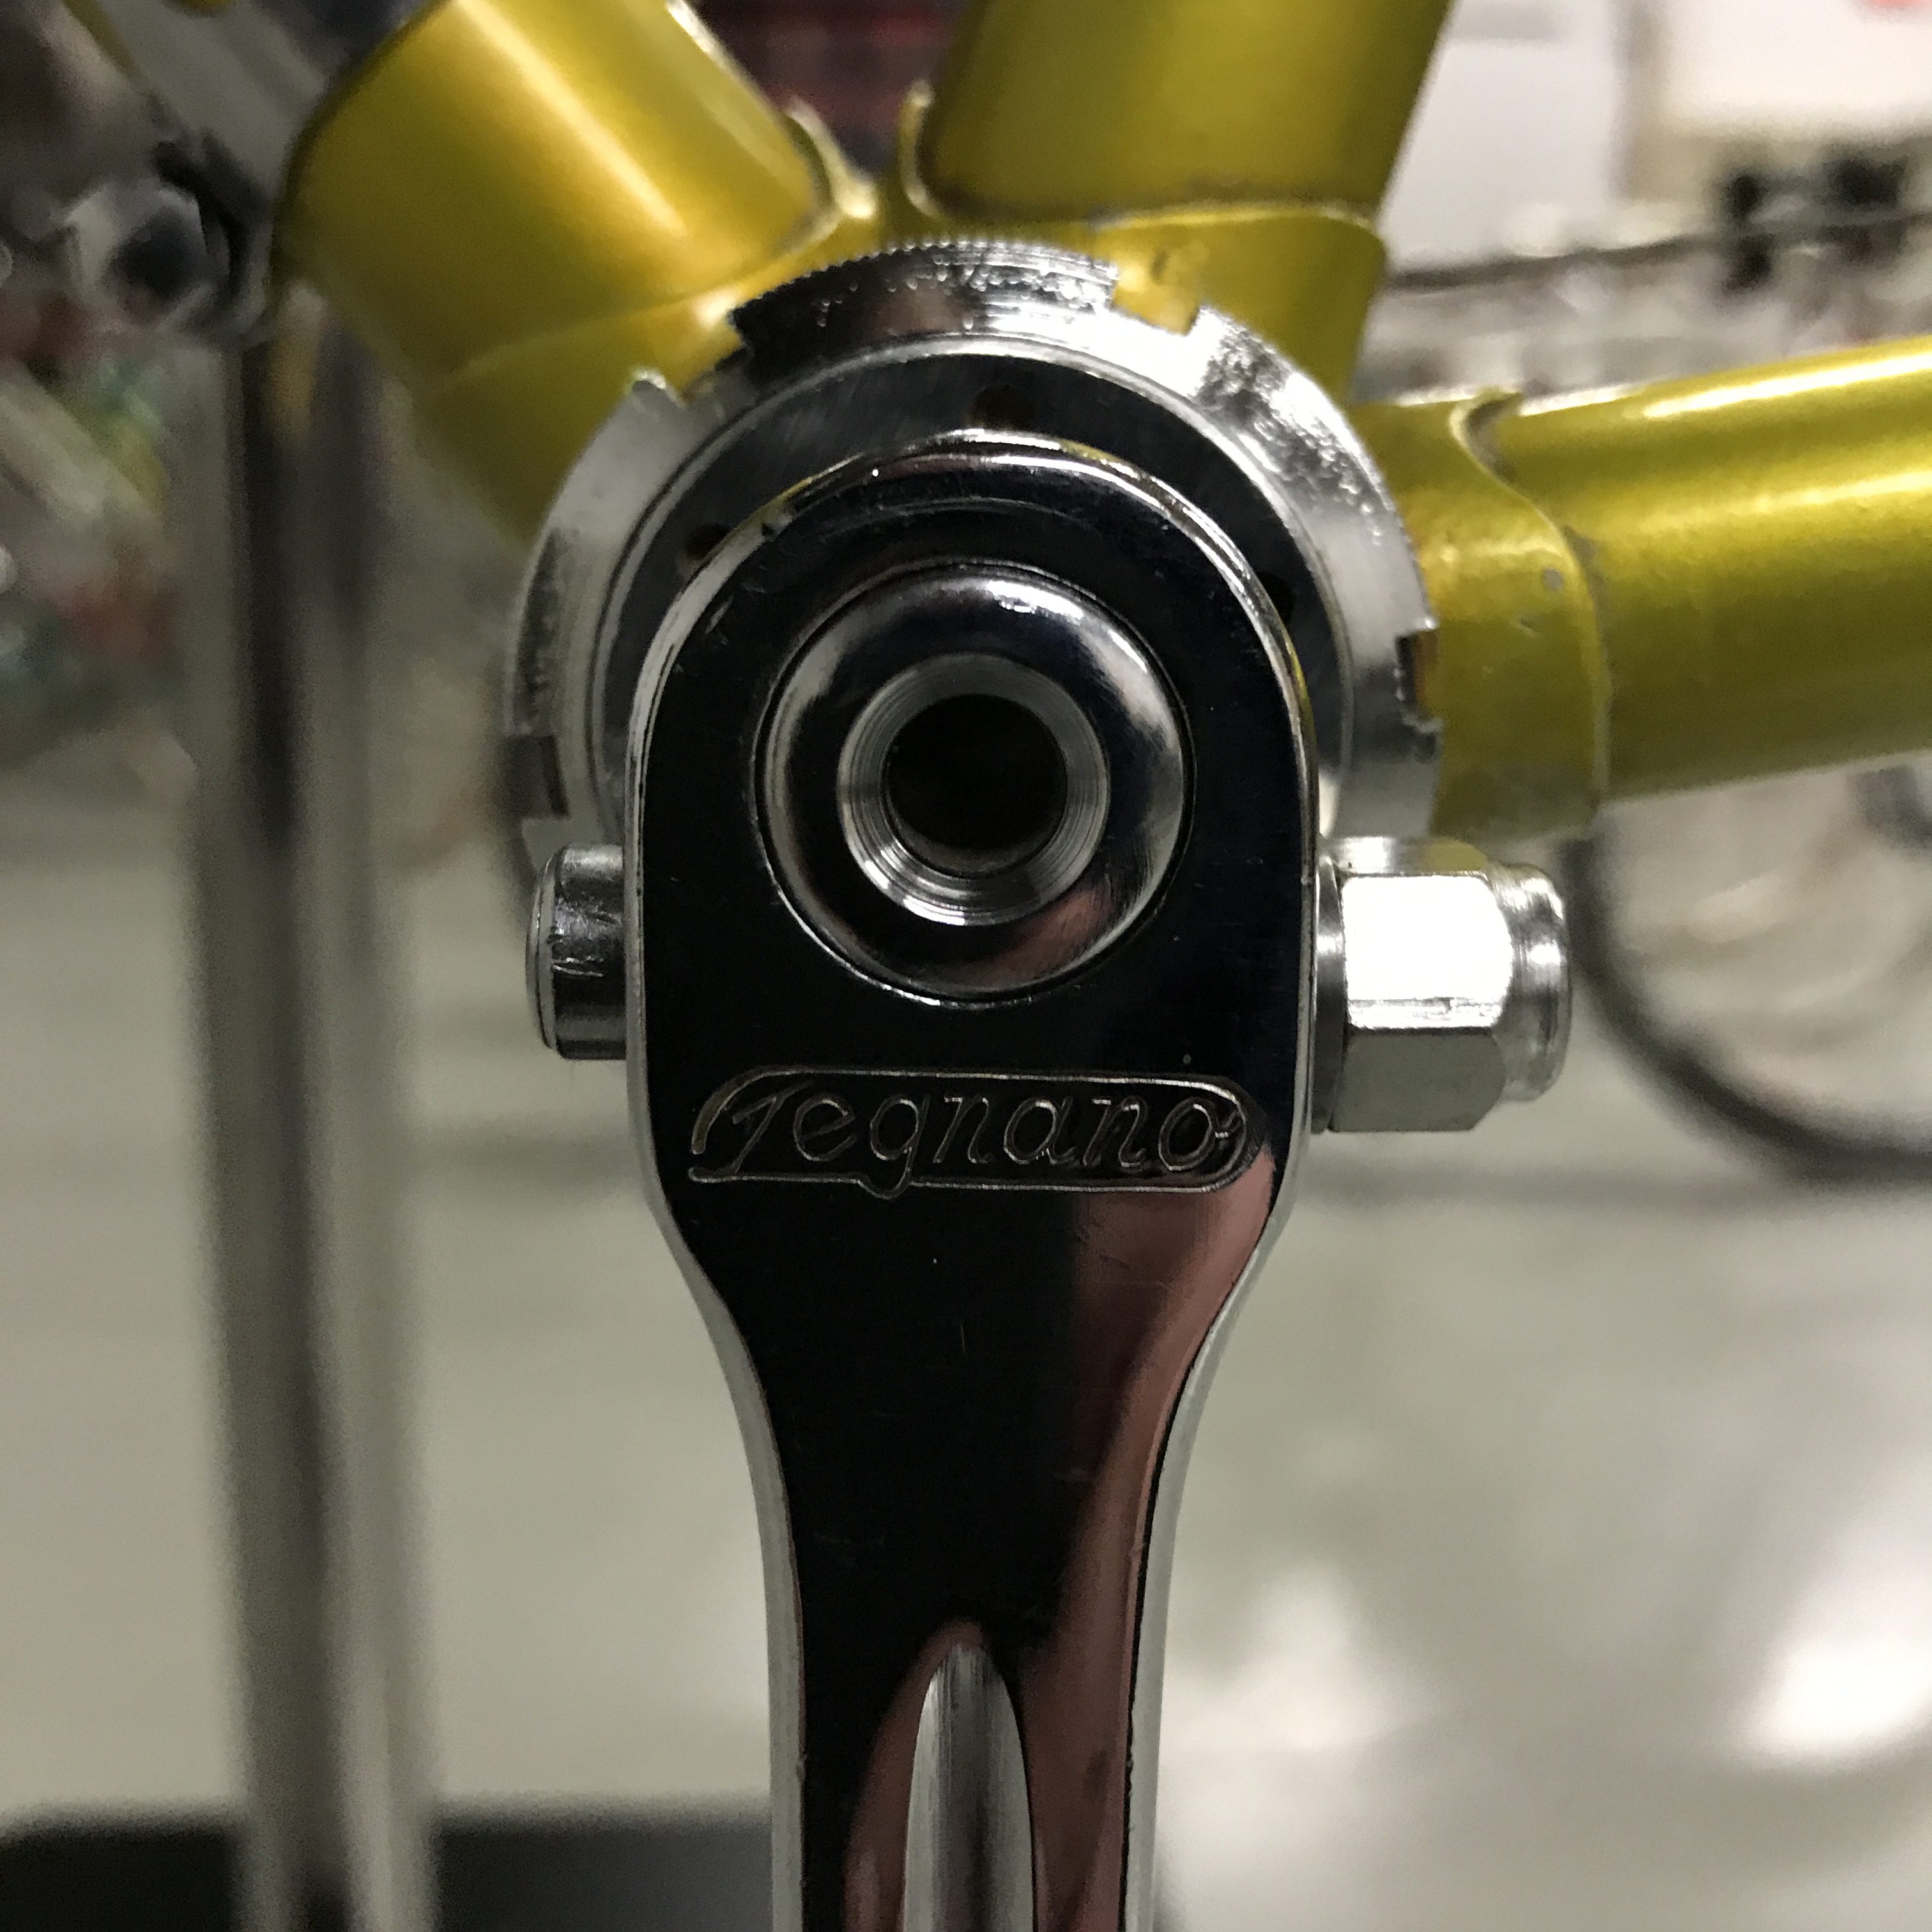
Headset: Way-Assauto
Brakeset: Universal Mod.51 with sidepull callipers
Seatpost: Chrome steel pin and clamp (26.4mm OD)
Seat: Brooks B17 (replacement, 1962 production)
This bike was sold to a fellow enthusiast and collector in August 2021.
